


Microsoft facilitates the users with various features and programs and one of the most exclusive applications in its pack is SensorExplorer that can be effortlessly downloaded via Microsoft Store. One can access the complete package from GitHub. It occupies only 22.04 MB of storage capacity, and it can be easily used to authenticate the installation of most of the compatible sensors such as orientation sensors.
The application also enables the users to produce comprehensive plots and precise tables that allow the users to monitor various sensors that help the users to monitor dual screens too. Here is how to use “SensorExplorer 2.0” to check Dual Screen Feature on Windows 10.
Using SensorExplorer 2.0 on Windows 10
Users can use Sensor Explorer 2.0 on Windows 10 to check Dual Screen very easily.
Downloading SensorExplorer 2.0
- It’s the first step towards using and applying SensorExplorer 2.0 on Windows, and the process is completely straightforward.
Downloading via Microsoft Store
- Hit any of the desired web browsing applications to launch and then reach the official page of SensorExplorer.
- Once you reached the web page of Sensor Explorer, then tap on the Getting option and then choose the option “Open Microsoft Store” from the prompt menu.
- When Microsoft Store launches on the screen, you need to press the Get button again.
- Then, wait for a while for the application to get downloaded and installed on your device.
Downloading SensorExplorer via GitHub
- In the beginning, reach the site of GitHub and then you will be required to fetch the app package tools located inside the folder of SensorExplorer for the process of sideloading.
- Now, download the complete package in a manual way.
Procedure for Checking Dual Screen on Windows 10
First of all, you have to ensure to check these specs and guidelines before starting to SensorExplorer 2.0 on your device:
Checking whether Two Sensors and Accelerometers are Present
Users need to check all the components properly whether these components are properly interacted with each other and are ready to use:
- In the beginning, you have to enter into the app and hit the tab “View” mode. It will appear as three-layered dots or parallel lines.
- Then, you need to scroll your cursor in a horizontal way to check all the four components on your display. You will be able to view these components and their details on your device’s screen:
- Simple orientation Sensor 1
- Simple Orientation Sensor 2
- Accelerometer 1
- Accelerometer 2
Note: In case you are viewing all the components mentioned above, then you may proceed to the next step.
- If you are unable to see any of the things mentioned above, then it means that your sensors are enumerated to your Operating System. So, ensure to have all the sensors on your display.
Using Unique Panel ID for Sensor and Accelerometer
Here is how to check the unique panel ID in the orientation sensor and accelerometer:
- First of all, you have to hit the View Mode tab that appears in the upper left-hand side screen.
- Then, scroll down the mouse horizontally and then tap the Hide Plot option.
- After that, launch the option “Physical Location of Device” to check the Unique Panel ID.
Testing Dual Screen Mode
You have to test the devices for dual-screen mode, and there are various processes to check it.
Performing Hinge Angle Test
- First and foremost, you will require managing two different panels of your device to achieve the hinge angle with specific criteria. Then, test the sensor readings as per your desire. To do so, pursue these guidelines:
- At the start, navigate towards the Dual Screen Testing Mode.
- Then, hit the Hinge Angle Test option to launch the process.
- After that, choose the option related to Angle Sensor that you wish to test from the pull drop menu.
- On the following display, you will see a circle with relevant data. Now, you may change the hinge angle in 60 seconds.
Posture Testing
In this procedure, you will be requested to place your device in a specific place and then check the sensors there. The process might take 20 seconds.
Follow these guidelines to perform posture testing:
- First and foremost, hit the posture Testing option situated under the option of Dual Screen Testing.
- Every round consists of a specific posture that can be tested and make sure to fetch a different posture each time.
Flip Testing
- The process of flip testing is very straightforward as you will be asked to flip your device to launch and then shut it off, and thus the sensor will test the flip procedure.
- You have to monitor every action while flipping your device each time you check it. The process will provide only ten seconds to perform this action.
Ava Williams is a self-professed security expert; he has been making the people aware of the security threats. His passion is to write about Cybersecurity, cryptography, malware, social engineering, internet and new media. He writes for Mcafee products at mcafee.com/activate.
Source : SensorExplorer 2.0


Those devices which are released a few years ago don’t have the latest updates regarding security.
For decades, China has been building and refining the ability to track its citizens’ whereabouts and interactions to contain dissent and protest.
The state’s effort to try to contain the rapid spread of the new coronavirus is now testing the limits of that surveillance system.
Photographer: Qilai Shen/BloombergSource- https://softwarerichard.wordpress.com/2020/05/20/buying-an-old-android-device-know-about-the-privacy-and-security-loopholes/What is the Highest Security Path of Device’s OS?Some technology experts are always up to for finding new hole in mobile device’s software, and to keep the users safe and to not get exploited, the company releases security updates.
Whenever the company sees any threat to the mobile devices, they release new security updates to solve the issues.
Using Out of Date Mobile Device is Safe?
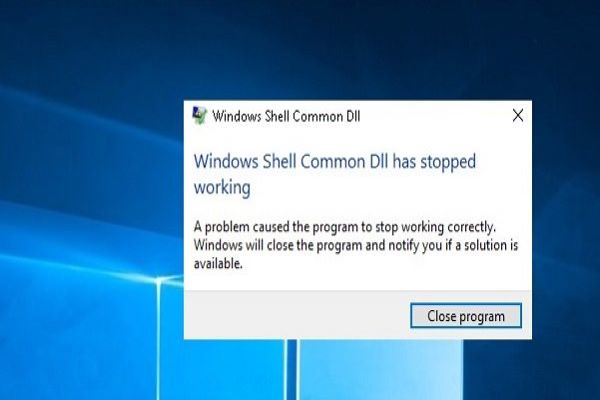
Several errors might appear on your computer and one of them is the Windows Shell Common Dll has stopped working.
This error prevents you from practicing primary Windows features, also can severely reduce your productivity.
In this blog, we will teach you how you can fix this error in a straightforward way.Sources :- Windows Shell Common DLL has stopped Working Error , Mcafee.com/activate 1) “Windows time service” is workingTap Windows + R key and enter service.msc, now tap enter or hit OK.In the next screen service Windows will appear, here find “Windows time service”.Then right-tap on it and then choose Start on the menu.When the “Windows time service” is launched, you can change sate and time in your PC without having any issue.
Remember one thing this solution is only working when the error notification appears on your screen when you are trying date and time.2) Using another App to Change Microphone SettingsHere are the steps on how to fix Windows Shell Common Dll has stopped working error using another app to change microphone settings:Launch Bandicam and visit the Settings.Now tap on the Settings option in the Record menu.Record settings will appear on your device, and now you only need to tap on settings option that appears near the microphone.After this above process, you can view standard microphone windows, and you can change the settings without having any issue.3) Reinstall Audio DriversHere are the steps on how to fix Windows Shell Common Dll has stopped working error through reinstalling the audio driver:Tap windows + X key to open the Win + X list, and pick Device Manager within the list.When the Device Manager finds Audio operator, then right-tap on it.Select the Uninstall device on the menu.In the next Windows, a Confirmation dialog appears now Check to Exclude driver software from this Computer.Tap on Uninstall to remove your audio driver.After this above process, Windows will automatically install the lacking drivers and fix the issue.
Some users suggest restarting your computer instead of an uninstalling audio driver.4) Changing Security PermissionHere are the steps on how to fix Windows Shell Common Dll has stopped working error through changing security permission:Tap windows + R key and enter regedit.Tap Enter and the OK.Now the Registry Editor appears on your screen, navigate to the (ComputerHKEY_CURRENT_USERSoftwareMicrosoftWindowsCurrentVers) key,Right-tap on UserChoice and choose Permissions on the menu.In case you find group or user names is empty, that means your security permission is not available in your windows, and you have to attach this permission again.To attach the missing security permission, tap on Add option.Now the administrator group has to be attached to the group or user name menu.Choose Administrators in the compiled list and review completely control in the Allow menu.Now tap on OK and then Apply to save changes you have done.5) Copy required files to system32 directoryHere are the steps on how to fix Windows Shell Common Dll has stopped working error through Copy required files to system32 directory:Move to “C:WindowsSystem32” directory.Find joy.cpl and then copy it on the desktop.Right-tap joy.cpl and choose Properties in the menu.Move your cursor to the safety tab and tap on Advanced.Find the Owner section and tap on Change.Here enter your user ID in the field and choose Check Names.If there everything in the correct order, then tap on OK to complete your change and save it.After that, you need to tap on Apply and then on OK to save your changes.After this above process, delete joy.cpl.When your file is deleted visit C:WindowsSysWOW64 directory.Find joy.cpl and then copy it on C:WindowsSystem32 directory.Abigail Smith is a creative person who has been writing blogs and articles about cyber security.
He writes about the latest updates regarding mcafee.com/activate and how it can improve the work experience of users.

McAfee.com/Activate – Learn How to Activate your Retail Card for McAfee Total Protection by visiting McAfee.com/Activate and get your McAfee Total Protection Activated.
McAfee.com/Activate As the name proposes, McAfee Total Protection is perfect for generally useful gadget security as far as Operating System, the number of gadgets and progressed malware.
Be that as it may, in the event that you are confronting any inconvenience, look at the given agenda.
Tap on the connection and a setup download will start.
When the McAfee programming is installed on your gadget, run it on your gadget by double tapping on the McAfee symbol.
Give your record subtle elements and enter the Product Key.

To bolster your device with the security of McAfee, visit McAfee.com/activate.
Sign up, and then login to your account, enter the 25-digit activation code, and download the McAfee installation file.Steps to Download McAfeeThe most convenient way to download McAfee software to your device is through the mcafee.com/activate site.
Let’s follow these instructions to make it happen:First, you need to open an internet browser.
Then, you should enter www.mcafee.com/activate into the URL bar.After that, you should click the My Account option.
Then go to Sign in link.
Once you have logged in, you need to choose the Device type that you want to safeguard with McAfee.

The creator of The Walking Dead, Robert Kirkman, has confirmed that the zombie outbreak was due to space spore, and also, it’s not a joke but the disappointing reveal.
The series has completely ignored the primary reason for an outbreak, also in a certain occurrence that leads the characters to converse about ending the zombie virus.
When he was found as fraud, then the show moved on to several other things.The episode of a pilot on Walking Dead of Rick Grimes, as he wakes up from a coma in a place where everything is ruined.
Rick discover the corpses that all the people of the group called them as walkers started moving all around the region, and also, as far as they go, they are all over.
Fear the Walking Dead has shown the diverse side of an outbreak by displaying what has happened, but major series of it displays the zombie apocalypse.
However, it still ignores the origin of the virus.As a starting of Walking Dead, the audience may think due to which the zombie apocalypse has occurred, if it does not seem as it affects much the characters.

McAfee Chief Executive Officer Chris Young said in his 2019 MPOWER Cybersecurity Summit keynote address, time is the most important asset that we as a whole offer.
In any case, time isn't generally on our side – particularly with regards to cybersecurity.
It's the single most noteworthy weapon they have.
The discoveries of an ESG paper dispatched by McAfee agreed: "Associations need greater perceivability into digital dangers so they can tailor and organize their danger reaction and hazard remediation activities in arrangement with dangers that may hit them," said Jon Oltsik, ESG individual.
"Numerous organizations need to be increasingly proactive however don't have the assets and ability to execute."
Security examiners will require the correct innovation to do the examination, a blend of human aptitude and the most developed man-made reasoning and AI abilities that give knowledge about which moves to make.The assorted variety of the crude materials an association utilizes matters.


