


Do you know that your device running Android 10 has a built-in audio amplifier? Possible you might have noticed it on your phone several times. However, you might have no idea about how to use it efficiently. This sound amplifier has a purpose of enabling powerful and more natural audio experience on your device.
Read Full Article Here - How to Effectively Use Android 10 Sound Amplifier


Up till now, we had to use a USB-C cable to connect a Google Stadia controller to an Android smartphone or tablet.
Sometimes you might even want to play non-Stadia games on your Android device with the help of your Google Stadia controller.
In this article, you will learn a simple way to connect the Stadia controller to a smartphone or tablet.How to Use Google Stadia Controller on Android WirelesslyFollow the instructions mentioned down here to quickly connect your favorite joystick to your Android equipment:First and foremost, head to Google Play Store.Then search for Google Stadia and then choose the app from the results.Make sure the app is updated to the latest version.
Click the Update button to update your app to the latest version.If you haven’t installed the application on your device, then promptly install it by pressing the Install button.Wait for the installation and update to wrap up.Once you have the latest version of the Stadia app, open it.Inside the Stadia app, click on the joystick icon located on the top –right corner of the screen.
The app will start searching for the available Stadia controllers.Now grab the controller and tap and hold and the Stadia key on the controller.When the controller vibrates, release the key.Now the backlight should begin to pulse.Your Stadia controller should now show up in the Stadia app.
If it is not showing, wait for a moment, and it will appear.In case the app doesn’t find any nearby device, press the refresh icon to search again for your controller.In some cases, the controller may appear the second time.If the phone is unable to discover your Stadia controller, you should turn off the Bluetooth and then quickly turn it back on.

The dark mode also protects your eyes from light and helps you to sleep more comfortably.
You can also enable the dark mode on an individual app.How to activate the Dark Theme on Android PieAlso known as Android 9, Android Pie is the newest Android version released recently.
On the pop-up menu, select ‘Dark.’You’ll see the app drawer, notification panel, and other places in the dark theme.
This will also enhance the battery performance of the phone.To restore the default theme:1.
If you want to get the previous version back, repeat the above steps and tap ‘Disable dark mode.’How to activate the dark theme on Google’s Phone appYou can change the white interface of your Phone app to the dark, here’s how.1.
Toggle the sliding button of “Night Light” to turn the feature on and off.5.

It is ideal to clean junk from your Windows 10 system from time to time for better and smooth performance.
Several users still haven’t learned how to clean the system properly.
Windows installation often builds junk and cache that requires space.
Excessive junk results in wasting of resources and crashing of the system and needs to be cleared from time to time.
Here is a step by step guide on cleaning your Windows 10 system to boost its performance.Source : http://2norton.com/step-by-step-guide-for-cleaning-windows-10/Deleting Large FilesIt is amongst the basic steps to perform to clean your Windows 10 system.
There are several ways available to eliminate bloatware from your PC:By using PowershellBy uninstalling Windows 10 bloatware appsBy deleting Windows 10 bloatware with DISMBy using hide apps command “Remove-AppxPackage”Eliminating Large ProgramsLarge programs often result in crashing and slowing down of the system.
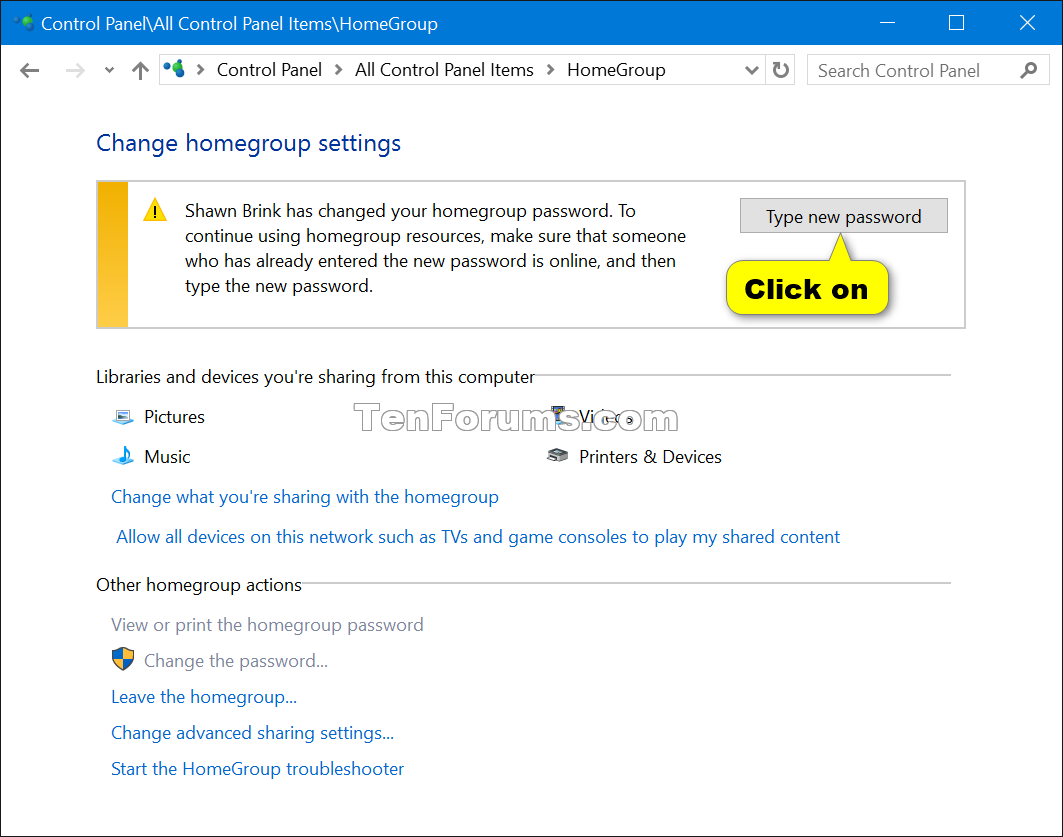
Many users are facing issues while changing or retrieving the HomeGroup password to use it on their local network.
Most of the users are trying to place the new system to the HomeGroup, or they try to remove the current system.
If you want to change HomeGroup password in Windows 10, then go through the instructions listed below.Steps to Change HomeGroup Password in Windows 10• Click on the Windows and R keys together.• Now, you will get the Run pop-up box on the screen.• Enter “control” in the search bar.• Click on the Enter option.• It will launch the classic Control Panel menu.• Press on the HomeGroup option in the Control Panel menu.• Start using the search bar to get the option in case you are not able to find it.• In the HomeGroup settings tab, press on the Change the password option.• After getting the Change your HomeGroup password menu, press on the Change the password option.• Enter the HomeGroup password.• Press on the symbol linked with the checkbox.• Press on the Enter option.• Press on the Next option,Steps to Retrieve HomeGroup password in Windows 10 through File Explorer• Go to the File Explorer.• You need to right-click on the HomeGroup.• Press on the View the HomeGroup password option.• It is located on the right side of the panel.• Now, a new window opens on the desktop where you will get the HomeGroup password.• It is located in the yellow checkbox.Steps to Retrieve HomeGroup password in Windows 10 through HomeGroup Ribbon• Go to the File Explorer menu.• Start using the left side of the menu list.• Press on the HomeGroup option to choose it.• Click on the ribbon bar.• It is located on the upper side of the screen.• Press on the HomeGroup option by going to the ribbon bar.• It is given on the upper side of the screen.• Press on the View option.• It will open the display where you can change the HomeGroup password.• Now, you will get the HomeGroup password in the yellow box.Steps to View HomeGroup Password Through Control Panel• Click on the Windows and R keys together.• It will open the Run prompt box.• Enter the “Control” in the search bar.• Click on the Enter option.• It will launch the classic Control Panel menu.• In the Control Panel, press on the HomeGroup option.• In the HomeGroup window, press on the View or print the HomeGroup password option.• It will open the menu where you will get the HomeGroup password.• It is located in the yellow checkbox.source url:- http://ww-norton.com/how-to-change-homegroup-password-in-windows-10/Ava Williams is a Norton product expert and has been working in the technology industry since 2002.
As a technical expert, Ava has written technical blogs, manuals, white papers, and reviews for many websites such as norton.com/setup.
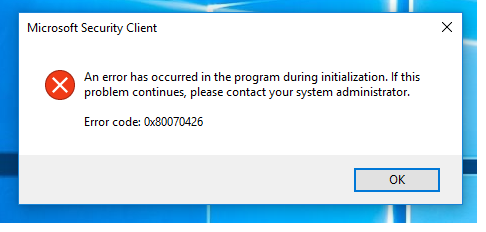
The 0x80070426 error code mostly shows up when the system processes mismatches and initialization issues.
In case Microsoft Essentials used to stay on your device, and you need to update to Windows 10, which provides the security of enhanced Windows Defender, the error could show up.This often happens if the application is not supported by the third-party software you got in your device.
This error can trigger a plethora of other issues in case you ignore it.Fix 1.
Removing Microsoft EssentialsHere is a guide to removing the Microsoft Essentials from your system to fix the 0x80070426 error code:On your system, press the Windows logo + D keys altogether to bring yourself to the desktop screen quickly.
Now press the ALT + CTRL + DELETE Keys at the same time on your computer keyboard.Then head to the Task Manager option to trigger the Windows Task Manager.Look for the option called Windows Defender (Windefend) and then make a right-click on that.Head to End Task.Now head to the start menu by pressing the Windows logo key on your keyboard.Put in the Control Panel and then hit enter.
Uninstall the Windows defender.Fix 2.