


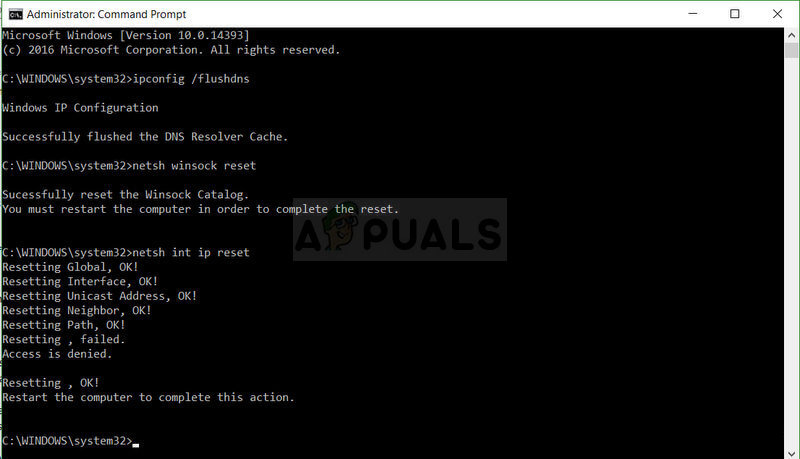
Windows is an amazing operating system, but it does cause problems at times. Several users are facing the ‘netsh int ip reset’ failed problem on their Windows PC. If you are one of them, then follow the different solutions mentioned in this article to fix this issue.
Here’s how to fix the ‘netsh int ip reset’ failed problem on Windows
· Offer Sufficient Permissions for the ‘ netsh.exe’ file
1. Go to the Registry Editor menu by entering “regedit” in the text box.
2. Click on the Start option.
3. Click on the Run prompt box.
4. Click on the Windows and R keys together.
5. Go to the below-mentioned key given in the registry by going at the left-hand panel:
HKEY_LOCAL_MACHINE\SYSTEM\CurrentControlSet\Control\Nsi\{eb004a00-9b1a-11d4-9123-0050047759bc}
6. Enlarge the key, find the folder which is known as 26.
7. You need to right-click on it.
8. Select the Permissions option.
9. It is located on the prompt menu on the screen.
10. Press on the Advanced option.
11. You will get the Advanced Security settings menu.
12. You have to start changing the owner of the registry key.
13. Press on the Change URL.
14. It is given near to the “Owner” option.
15. Now, you will get the Select User or Group menu on the screen.
16. Choose the user account through the Advanced option.
17. Enter the user account details in the section which indicates ‘Enter the object name to select.’
18. Press on the Ok button.
19. Start adding everyone.
20. Additionally, start changing the subfolder owner.
21. Change the files in the folder.
22. Choose the box which indicates “Replace owner on sub containers and objects.”
23. It is located in the Advanced Security Settings menu.
24. Press on the Add option.
25. Press on the Select a principal option.
26. It is located on the upper side of the screen.
27. Choose the user account through the Advanced option.
28. Enter the user account details in the section which indicates ‘Enter the object name to select’ option.
29. Press on the Ok button.
30. Below the Basic permissions column, ensure that you choose Full control before you save the changes you have made.
31. Start the system again.
32. Check if you have fixed the “Resetting failed. Access is denied’ error.
· Replacing the antivirus tool you are currently using
1. Press on the Start option.
2. Go to the Control Panel menu by finding for it.
3. Additionally, press on the gear symbol.
4. It will launch the settings tab.
5. Choose the View as -Category option.
6. It is given at the upper right-hand side of the screen.
7. Press on the Uninstall a Program option.
8. It is given below the Programs column.
9. In case you have opened the Settings tab, press on the Apps option.
10. Find the antivirus tool.
11. It is located in the Control Panel menu.
12. Otherwise, press on the Settings tab,
13. Click on the Uninstall option.
14. Press on the Finish option.
15. Restart the system to save the changes you have done.
Source url:- http://quickproductactivate.com/blog/how-to-fix-the-netsh-int-ip-reset-failed-problem-on-windows/
Ava Williams is an avid technical blogger, a magazine contributor, a publisher of guides at mcafee.com/activate, and a professional cyber security analyst. Through her writing, she aims to educate people about the dangers and threats lurking in the digital world.


McAfee offers real-time protection against threats(new and old), malware, and other cyber insecurities.
To get protected, login or make an account at McAfee Activate, redeem the product using the product key and download the McAfee antivirus setup.
After installation, go to website and activate the product using the 25-character alphanumeric product key.
Steps for downloading the McAfee security programStrengthen your security by installing the McAfee program on your device.Steps : Switch on the device on which you wanted to download the McAfee program.Open any web browsing application like Opera Mini or Dolphin.
Double click on it.Open mcafee.com/activate.You will see some tags at the top of the window.After that, hit on CountryOpen the pull-down list and select the Language.Press on Language.Open the pull-down list and choose the language.Press on the regionType the right regionYou require signing up for McAfee account, in case you do not have any account already.Press on Log in and type the username and password for the McAfee account to sign in.Tap on Create an account.Type the email, password, mobile number, name, and other information in the Sign-up display.Check McAfee Terms and Conditions.Agree on these terms and conditions.Press on the Install tab.Choose the method for downloading.The file will start to download.
More to readHow to Search Contents of Files in Windows 7How to Redact Text in Microsoft WordHow to use Instagram Story HighlightsHow to Use Vacation Mode in Your Smart Home6 Best Productivity Apps for Thinkers

Apple released iOS 13 for iPhone and almost instantly released iOS 13.1 for along with iPadOS specifically for tablets.
Apple released iOS 13 to compete against Google’s Android 10 in what seems to be a never-ending battle.About iOS 13iOS 13 was launched on September 19 by Apple.
It was followed by the release of iOS 13.1 on September 24, and a quick release of iOS 13.1 on September 27.
In case you have not yet updated to the latest OS, then do not worry, you do not have to update three times.
You can simply install the latest OS; however, you are advised to remove the old apps and make a backup for your data before updating.New Features for iOS 13 and iPadOSThe latest OS has several fascinating features and here are some of them you should know about.Prevent Unidentified CallersThe latest OS allows you to block unknown callers from calling you with one tap.
If you have enabled the feature, then you will only receive calls from numbers saved in your contacts, Messages or Mail.


If you have MacBook Air,then you would be delighted to know that you can connect it to a TV for browsing the internet, share pictures or presentations, make a higher workspace, etc.
There are many ways to connect your MacBook Air to TV and here are the simplest ones:Link MacBook Air to the TV via HDMIRemember that MacBook Air and TV are switched on.After that, connect the HDMI cord into the applicable HDMI port on the TV.You should attach the other end of the cord of HDMI to the ‘’Mini DisplayPort’ to the ‘HDMI adapter.’Connect the ’Mini DisplayPort’ to the ‘HDMI adapter’ to the MacBook Air through the port of lightning.Then switch on the TV and ensure that it adjusts to the right HDMI input.Now, enable the MacBook Air and sign-in normally and view the show mirrored on the TV.Link MacBook Air to the TV via Apple TVMake sure that MacBook Air and Apple TV are turned on and linked with a similar Wi-Fi connection.After that, click on the AirPlay button in the menu bar of MacBook Air.You should see the menu of the drop-down.Then click on the preference and choose the TV that you would like to link.Now, you are linked and ensure that all media will work through the TV.Finally, you want to detach the MacBook Air from the TV, click on the AirPlay button on the MacBook Air and later select the Turn AirPlay Off.Optionally, hit the Menu button on the remote of Apple TV to switch off the connection.Link MacBook Air to the TV via ChromecastFirstly, switch on the TV and check it adjusts to show the Chromecast.After that, turn on the MacBook Air and ensure that it’s linked to a similar Wi-Fi connection as the Chromecast.You should launch Google Chrome on the MacBook Air.Go to Chrome and click on the Chromecast button situated toward the upper right-hand side of the display.It will launch the applicable Chromecast devices list.You have to choose the Sources section and then click on the Cast section.Go to the TV you would like to cast to.After connecting, you will view a blue color circle.The section is shown on TV.When you have done, and you would like to detach the TV, click on the Chromecast section.Then choose the blue color circle or easily shut the tab of browser.ConclusionThe article is about the ‘Connect the MacBook Air to a TV.’ Through the medium of this article, we will help the users to fix ‘Connect the MacBook Air to a TV.’We hope you will avail of this article and find it is helpful.
It is advisable to be aware while reading the article to avoid any mistakes while implementing these guidelines.Eva Winget is an avid technical blogger, a magazine contributor, a publisher of guides at mcafee.com/activate, and a professional cyber security analyst.
Through her writing, she aims to educate people about the dangers and threats lurking in the digital worldTags:mcafee activate, mcafee.com/activatesource:https://expressdirectory.uk.com/blog/how-to-connect-the-macbook-air-to-a-tv/

But, McAfee still has its name in one of the best antiviruses in the world.
The most noticeable feature that we want in a good antivirus is the ability to detect and kill viruses.
According to a test, McAfee is capable of killing most of the “trojans” which are considered as one of the most dangerous viruses ever known.
McAfee has also shown excellent results in the EICAR virus test.
McAfee has three attractive products:
So, you can choose McAfee according to your requirements.


