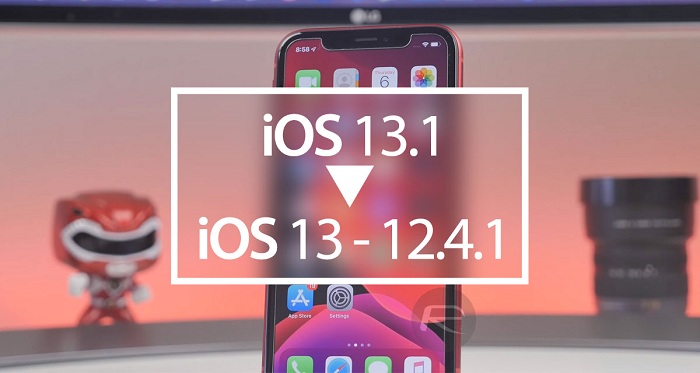
Downgrading from a higher version like iPadOS 13 or iOS 13, 13.1, 13.1.1 and 13.1.2 to a lower one like iOS 12.4.1 on your iPad or iPhone is a delicate task and you have to be very careful as it is taken as the advanced procedure.
It is always recommended to take a full backup of all your data on the computer system so you can restore it after downgrading the Operating System of your smartphone. Here is how you can do it securely.

1. Taking Backup and Necessary Instructions
- You must have a Mac or Windows computer ready before performing downgrading operation on your smartphone.
- If you wish to remove the existing iPadOS or iOS 13 from any of your iOS devices, then you have to be comfortable with this method.
Note: Do not perform any failed or improper downgrading attempt for doing this because an improper attempt may leave you in overall data loss.
- It is also advised not to try to restore your iOS 13 or above-taken backups to iOS 12.4.1 gadgets.
- You can stay on the existing iPadOS 13 or iOS 13 in case you have taken a backup of iOS 13 device’s data. It will help avoid huge data losing.
In another way, you might lose all your data from your iOS devices after the completion of the process in case you haven’t taken a backup of your iOS 12.4.1 data.
2. Downgrading iPadOS 13 and iOS 13 to iOS 12.4.1
Follow these provided instructions in case you wish to downgrade your iOS 13 to 12.4.1:
- First of all, it is advised to take a proper backup of your iOS 12.4.1 data for restoring just after the downgrading process.
- Then, install your iOS 12.4.1 “IPSW” file that peered with your handheld device and then ensure that the IPSW file is easily accessible for searching.
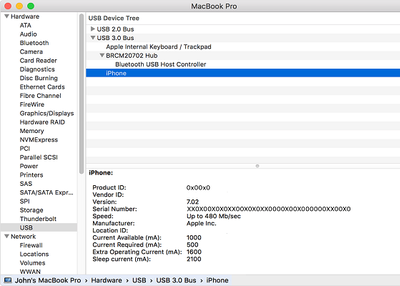
- After that, open iTunes on your Mac or Windows PC, or you can launch “Finder” in the “MacOS” Catalina.
- Next, connect the system to your smartphone operating on iOS 13 through a USB cord.
- Then, locate the connected device hi hitting on the smartphone icon present on the menu bar of your iTunes. It is situated within the “Finder” in the case or Catalina and iTunes in the case of iOS devices.
- Now, navigate to the “Device” description panel of the “iTunes” (“Finder” in the case of Catalina) and then perform these steps:
- If you are using Mac:
- Press and hold down the tab “Option.”
- After that, tap on “Restore.”
- If you are using Windows:
- Press and hold down the “Shift” tab.
- Now, hit the “Restore.”
- Then, you have to choose the file “IPSW” of iOS 12.4.1 for your smartphone that you installed some time ago.
- Wait for a while to complete the overall procedure.
- Once your iOS device begins backing up, follow the usual setup process and its instructions.
- Then, select the appropriate backup and restore option from iTunes or iCloud.
Note: If you have the backup data available from iPadOS 13 or iOS 13 or above, then it is advised to stay on iPadOS 13/ iOS 13 or above.
In case you select the setup process of the device as fresh, then you might lose all your files and data from iOS devices.
You are not allowed to restore your data backup on iOS 12.4.1 in case you don’t have a data backup compatible with this version.
Note: The downgrading of iOS versions from a newer one will run smoothly on your system as it is signed digitally by Apple from time to time.
Rdx Tango is a creative person who has been writing blogs and articles about cyber security. He writes about the latest updates regarding avast.com/activation and how it can improve the work experience of users. His articles have been published in many popular e-magazines, blogs and websites.
Source:- https://caavast.com/blog/how-to-downgrade-ios-13-back-to-ios-12-4-1-using-itunes-or-finder/


This article will discuss how to add or remove the calendars on an iPad or iPhone.
With the efficient Calendar app, the process of schedule management won’t be hectic for you.
The Apple Calendar is always ready to keep you updated.
Apple’s stock calendar app has recently added various useful features to help users easily keep a record of all their upcoming events.
Read Official Blog Post - How to Add or Remove Calendars on iOS and iPadOS?

Following a to some milestones arrival of iOS 13, at that point the update to iOS 13.1 and the release of iPadOS the next week on September 24, at that point a further steady update to version 13.1.1, 13.1.2, Apple is again looking towards the following primary release of the operating system to versions iOS 13.2.
If you hopped off the beta to introduce iOS 13.1.1 (and after that iOS 13.1.2), you’ll have to re-select your device at beta.apple.com.
Seven exciting new features is a great deal for a minor form!
Originally observed back in the first iOS 13 beta, this seems to be the key feature of iOS 13.2.
You do, obviously, must have many AirPods matched with your selected beta device to empower this.
Highlighted at the iPhone 11 event, the new Research app is a fascinating new idea, where users can volunteer to take part in medical research, using the tsunami wave of biometric data gathered by your Apple device.
iOS 13 Top 5 Features: Apple released its iOS 13 updates a week ago and only five days it has turned out with another form of the working framework which has plenty of novel highlights you can give it a shot.
iOS 13 Top 5 Features
1 iPadOS 13.1 is here
The tablet form of iOS accompanies a lot of performing various tasks highlights, just as an improved browsing knowledge in Safari.
If there should arise an occurrence of an unanticipated deferral during the movement, Apple Maps will naturally make an impression on the contact telling them you are running late.
3 Experience Karaoke machine using Apple Music


iTunes is one of the most popular apps from Apple, which offers movies, shows, and music.
But while synchronizing the iOS devices like iPad, iPhone, or Mac with the Windows 10 system, you are facing the ‘iTunes-54 error.
So, here are the steps to fix the error.Read more - https://webrootsafe.uk.com/blog/how-to-fix-itunes-error-54-on-windows-10/