


Are you running Facebook ads but not seeing sales? We all have been there! But you don’t need to stick there. You can upgrade to a new one!
There is one thing that I have been requested so many times is how to upgrade to a new and better facebook pixel code...Well, it’s not rocket science if you have a good plan!
With the following easy steps that I learned from a guide at “PixelYourSite.com”, you can migrate your conversion tracking over to the Facebook pixel. I am using here Here’s how:
Well, there are two things you need to keep in mind:
- The NEW Facebook Pixel has ZERO data.
- The pixel data is available for 180 DAYS.
You gotta train your new pixel for 180 days, re-create Custom Audiences and Custom Conversions, add it to your Product Catalogs, replicate Pixel Events, and use it for your ads when needed.
Step # 1: Create your new Facebook Pixel
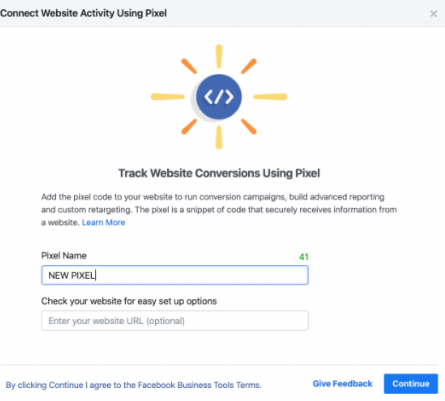
Inside your Facebook Business Manager, go to Events Manager and click on Add New Data Source. Follow the next steps until your new pixel is created.
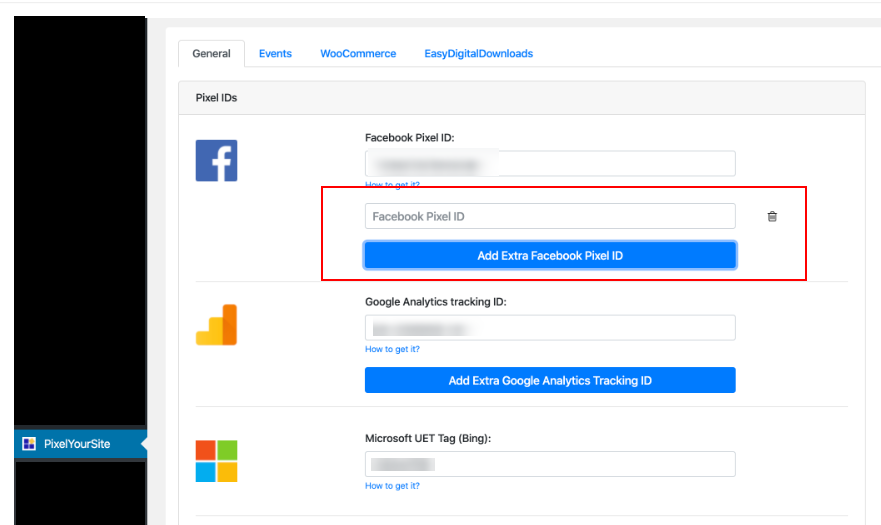
Step # 2: Install the new pixel on your dashboard
Once again, “Do Not Delete Your Old Pixel!”
I am using here PixelYourSite Pro from Pixelyoursite.com (use Pixel Your Site discount vouchers for instant discount) because it allows multiple pixels..
Simply open your pixel your site dashboard, click on the Add Extra Facebook Pixel Id button, and enter your id and save the settings (refer to the image below).
Step # 3: Train Your New Pixel
Now as I said, this one will take up 180 days. For this, you will need to replicate your custom audience, lookalike audiences, and your custom-conversions.
Now, go inside your business account and click on the top menu, and open Product Catalogs. Click on the catalog’s link and select “Events Data Sources” from the left-side menu.
Enable the new pixel and click Save.
Go inside your Business Account, click on the top menu, and open Product Catalogs. Click on the catalog’s link and select “Events Data Sources” from the left-side menu.
Enable the new pixel and click Save. Moreover, your new pixel should send the same events and the same parameters as the old one. If you have a smart plan such as Pixel Your Site Pro, your single plugin would be sending all the existing events to every installed pixel automatically.
Step # 4: Update your Ads campaign
Your current campaigns now are optimized and tracked by the old pixel that you still have and they target your old (actual & lookalike) custom audiences. So, you gotta do the following 2 things now:
Change the pixel that tracks your ads: For Catalog Sales campaigns that use “Retarget ads to people who interacted with your products on and off Facebook.” you must change the pixel AFTER the number of days your ads are configured to go back.
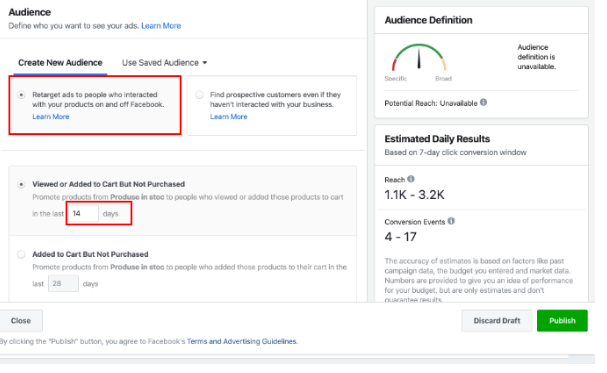
To change the pixel for your existing ads, open your Ads Manager and select all the campaigns you want to change. Click “Edit”, go on “Ads” and scroll down until you find the Tracking section. Select the NEW pixel and click Publish.
Change your targeted audience: You can edit your ads and add the new Custom Audiences along with the old ones. The same trick can be applied to new ads.
Now delete the old one after like 180 days! Simple as that!
Happy Advertising!


Whether it is a festival, wedding, birthday, anniversary, or any other important day to be celebrated, one thing common across all these events are gifts.
But again selecting the perfect gift for your near and dear one is very confusing and puts you in the dilemmatic situation what to offer to them which they don't have or something they might look for.
However, in this case, you can go for Flipkart Discount Vouchers that not only bring you the best solution for your gifting needs and make you feel satisfied with your best gifting option.Flipkart vouchers are the perfect way to shop much more than what you wished to.
Under every category, you can find large discounts up to 90% off and 75% off on select products and more such offers and buy these items at the lowest prices using Flipkart coupons.
So in this case Instead of giving any boring traditional gift, you can make your gifting option more exciting and effective by choosing a wide range of Flipkart Vouchers from trusted coupon websites that not only match their mood but offer them the freedom to buy what they want.
When you are thinking to purchase Flipkart Vouchers, you may get so many coupon sites online to purchase this Flipkart coupon, but choosing a reliable coupon website is always convenient who can offer you the perfect varieties of Flipkart Discount Vouchers in a range of values, starting from Rs 100 to Rs 5000 and even more, with a validity period of 15 days to 12 months.Why do you choose the trusted coupon site for Flipkart Discount Vouchers?


What if they’re showing signs of distress or you notice a sudden change in their behavior?
Not only humans experience such issues, but dogs too suffer from mental disorders a lot of times!According to a study, when it comes to emotions, dogs’ brains are similar to humans.
Unfortunately, our four-legged friends can’t tell us about whatever they’re going through; however, their physical signs of distress can let their owners know if there’s something wrong.
Understanding the mental disorders in dogs, it’s important for the pet owners to know about the causes, symptoms and treatments of such conditions.Causes of Mental Illnesses in DogsBelow mentioned are some common causes of mental illness in dogs.
Signs of Depression• Reduced activity• Drastic weight loss• Excessive shedding• Loss of appetite• Sudden and drastic behavior changes.Signs of OCD• Self-mutilation• Excessive tail chasing• Repetitive or intensified behavior• Decrease in playfulnessSigns of Anxiety• Hiding• Trembling• Diarrhea or vomiting• Destructive behavior• Compulsive licking and grooming• Self-injuring• Attempts to leave or escape• Reduced activityTreating Dogs with Mental Health Problems!Seeing those adorable fur balls suffer from mental disorders is heart-wrenching!
Some of the ways that can help treat these little pooches are as follows:MedicinesMedicines certainly come first when we talk about treatment.

Better tasting and better smelling drinking water in a few bucks!
AliPromoCodes offers instant discounts on top selling zero installment water purifiers, whole house lead water systems & more from RKIN - PuricomUSA.
Buy now through Puricom discount vouchers & save big today!

Find Coupon Codes, Voucher Codes, Promotional Codes, Free Shipping Codes and Discounts for online stores of UAE at CouponSavingsUAE.com https://www.couponsavingsuae.com/


