Over the years, wooden furniture will begin to age, aligning its overall look and the general aesthetics of the interior layout. Bearing this in mind, picking to upcycle obsolete furniture rather than replacing things has continued to rise in popularity over the past couple of decades. Through using your creative side and engaging in just a tiny DIY, a range of household fixtures may be changed to get a cheap cost. If that is something which you're considering experimenting with, are super simple to follow along step guide to spray painting older wood furniture is certain to provide you with a head start!
Gone are the times where you need to thoroughly hand-paint old wooden seats, tables, or dressers, making sure that all coatings are without adhesive lines. Now you can put in a fresh coating of color to any surface as little as a couple of minutes throughout using spray paint. When it might take a couple of trial runs until you can correct the craft of spray paint, then it will definitely help save you both money and time, promising smooth outcomes.
1. Get Your Workspace
First things first you need to locate an acceptable workspace and then prepare the place for spraying. Although spray paint cans will be very safe for home use, they usually do contain chemicals that may prove possibly harmful if inhaled, so meaning that spraying at an open area, including your backyard, is best. In case you've got no other choice but to spray inside, it has to be at a well-ventilated location. For extra protection against fumes, then a spraying mask has to be worn in any way times.
As spray paint cans will be quite strong, you wish to make sure your environment is guarded. Whether you're spraying the floor or a horizontal surface, then cover the distance using an old bedsheet, a dust sheet -- some other substance you don't mind getting covered in paint.
2. Eliminate All Hardware
To make certain you could attain a smooth end, eliminate all fabric and hardware, such as seat cushions, out of the furniture.
Use a screwdriver to remove any screws, hinges, knobs, and pulls, taking extra care to not harm or divide the surrounding timber. All components can be set to a tiny resealable bag and put aside in the meantime to steer clear of modest components from moving missing. If you're spraying a bigger piece of furniture like a chest of drawers or apparel, eliminate shelves and drawers and paint them individually. Spraying each element separately is much simpler than trying to handle the whole fixture.
If you're upcycling a wooden seat that comes with a cushion, then you can also need to think about reupholstering the cloth components. It is possible to get a complete manual on how best to perform that to The Spruce.
3. Sterile The Furniture
Now you have disassembled your own furniture, it's time to prepare the top for spraying. Begin with cleaning the timber by means of a method of warm water and a couple of drops of washing-up liquid. Wipe the surface utilizing a gentle, weatherproof cloth.
If some areas are coated with a specially stubborn layer of grime, then a marginally stronger solution could be forced to divide the contaminants. Mix one part lemon juice using jojoba oil and start to wash the surface.
Make an effort not to soak the wood as much since this may lengthen the drying procedure. Normally, you should simply need to let 2 to three hours to the surface to dry before going on the next measure.
4. Sand The Surface
Virtually all wooden furniture was created with a shiny finish. When this seems fine, it is going to halt the furniture spray paint out of having the ability to stick, so will have to be eliminated.
To mattify the timber and make a rough surface the paint will adhere to, you'll have to sand the glistening finish. It's encouraged to just sand every section to get a max of 5-seconds. Even though this might appear just a brief quantity of time, it is going to permit the face to mattify without repainting the wood and making it irregular.
5. Remove Dust And Debris
A fast and effortless measure but often readily forgotten. As soon as you've sanded down all parts of your furniture, then make sure that all debris and dust is removed from the top layer. Struggling to remove loose contaminants can cause modest lumps under your paint.
Tack cloths really are an excellent means to eliminate all debris and dust without needing to warm the surface. They're equipped using a sticky coating which makes it super simple to pick up loose particles in only a couple of seconds.
6. Prime The Wood
Priming the timber before start spraying is a very important step in making sure your results continue and don't begin to peel, flake or blister. When choosing a primer, then it's vital to make sure you select one which is appropriate to the form of paint and material you intend on using.
They also prevent any previous stains on the timber from showing through the paint ideal for achieving smooth, long-term outcomes.
7. Do A Trial Run
Especially if it's your first time with spray paint, then we highly suggest doing a couple of trials prior to delving into spraying on your furniture. Paint sprays out of headphones with some electricity, meaning that it will take some time to have the hang of holding continuous pressure on the spout and also spraying even strokes. Practice for some time onto a scrap piece of wood or paper till you're feeling confident.
The spray paint kind which you elect for is largely depending on the color you aspire to realize. A number of the most Well-known options are the following:
British normal Aerosols -- Cans that collapse in the British Conventional aerosol class feature multiple colors of each color. Instead of only primary colors, you may select between around 30 color variants of each. Pantone Colour -- People that hope to utilize a custom-made color, by way of instance, to perfectly fit a present paint, will be best suited to this Pantone color range.
RAL Colour -- Having a selection between a gloss or matte finishes for every color; the RAL color range includes over 200 of the most common universal colors, all of which are prepared made. Start Spraying
8. Start Spraying
As soon as you're feeling confident you have the knack for spraying, then you are able to move on altering your furniture. It's your choice if you spray an up and down movement or side to side; either of which can be equally as powerful. Keep the canister consistently moving through as this may block the paint from leaking.
While many layers because you believe you have to be inserted into the timber provided that you allow lots of drying time prior to creating your next program. Spraying along with wet paint can cause flaking, peeling, and blistering.
9. Employ A Sealant
To make sure that grains of timber don't become loose, resulting in knicks and scrapes, and a last coating of sealant could be implemented. A polycrylic sealant will be the very best alternative for wood surfaces since they include a durable layer of security.
10. Reattach Hardware
After all, elements are totally dry, and you are pleased with the color, it's time to reattach hardware and then clean your furniture. Take additional care to make certain you don't chip, dent, or scratch your hard work!
And like this, your furniture was fully transformed and seems as good as brand new! Make certain not to hurry the procedure and take some time to improve your outcomes.


Looking for a car spray painting service in Epping, Melbourne?
Northern Prestige offers premium car spray painting services.
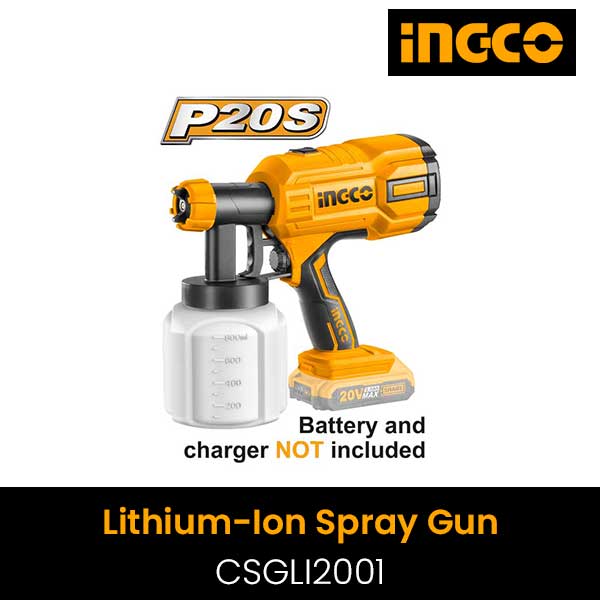
Respray your car with best the paint sprayer.

In today's life, we become so busy that we are not able to take care of anything and our shoes are one of the best examples.
It is common for shoes to be messy, but sometimes people are so careless that they even drop paint on their shoes.If the paint has fallen on your shoes by mistake and that spray paint, then this moment can be very difficult for you, keeping this in mind, I have brought some tips for you where you can remove spray paint from your shoes.Turpentine oil and thinner are most useful to remove the problem of spray paint on shoes.
You can also use solvents if you want.
Apart from this, if you want more useful tips that remove the spray paint from your shoes, then read this article, where you will not only know how to remove spray paint, but you will also be able to see the solution to remove other paints.

Spray Paint market is segmented by region (country), players, by Type, and by Application.
Players, stakeholders, and other participants in the global Spray Paint market will be able to gain the upper hand as they use the report as a powerful resource.
The segmental analysis focuses on revenue and forecast by region (country), by Type and by Application in terms of revenue and forecast for the period 2015-2026.Segment by Type, the Spray Paint market is segmented into:Manual spray paintAutomatic spray paintDownload FREE Sample of this Report @ https://www.24chemicalresearch.com/download-sample/57805/global-china-spray-paint-2026-751Segment by Application, the Spray Paint market is segmented into:AutomotiveAerospace & DefenseChemicalOthersRegional and Country-level Analysis:The Spray Paint market is analysed and market size information is provided by regions (countries).The key regions covered in the Spray Paint market report are North America, Europe, Asia Pacific, Latin America, Middle East and Africa.
It also covers key regions (countries), viz, U.S., Canada, Germany, France, U.K., Italy, Russia, China, Japan, South Korea, India, Australia, Taiwan, Indonesia, Thailand, Malaysia, Philippines, Vietnam, Mexico, Brazil, Turkey, Saudi Arabia, U.A.E, etc.The report includes country-wise and region-wise market size for the period 2015-2026.
It also includes market size and forecast by Type, and by Application segment in terms of sales and revenue for the period 2015-2026.Competitive Landscape and Spray Paint Market Share Analysis:Spray Paint market competitive landscape provides details and data information by players.
The report offers comprehensive analysis and accurate statistics on revenue by the player for the period 2015-2020.

Due to the pandemic, the need for disinfectant equipment is a big concern to stay safe & protected.
4S Nano Mist Sprayer makes it easy to disinfect & operate.
It’s compact pocket size is always good to carry anywhere while travelling.
Keep everything around you clean & free from bacteria & virus.