Trying to make a mywifiext.net login and failing to log in again and again. Then, you have stopped by at the right site. We are here to help you with mywifiext setup. We have chalked out some pretty easy fixes for the mywifiext.net login error. Hop on to www.mywifiext.net setup, to manage your wifi extender. To manage all the network configurations of your wifi extender or modify any login credentials you can use the local web address mywifiext.net. Let’s dive right into the blog to find out how to set up and troubleshoot the mywifiext.net issues.
How To Setup Mywifiext.net?
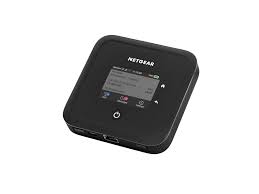
Mywifiext.net is a web address that is used to access the Netgear extender. But, to physically set up mywifiext.net you have to first unbox the Netgear extender and switch the power on. Keep the extender near the router for setting up mywifiext.net. Using your wireless device visit the web address mywifiext.net.e New Extender Setup on the page. Next, set up your Netgear genie account by lodging the necessary details. Finally, you just have to follow the instructions to install mywifiext.net installation.
How To Login To Mywifiext.net?
To start with the Mywifiext.net login first, establish a connection between your wireless device and the Netgear extender. Then launch your preferred browser and visit the mywifiext login page. If you are unable to access the site then type this IP address 192.168.1.250 in the address bar of your browser, it will direct you to mywifiext.net. To login to the admin page of mywifiext.net, you require the username and password of your wifi extender. Once you have got into the mywifiext.net login page you can manage the extender settings. Make sure your extender is in close vicinity to the wifi router during the mywifiext.net login process. That’s it, that’s how simple it is. Now you have logged into mywifiext.net.
How To Fix The Login Not Working Issue?
Once the setup of the extender is completed move it to the room or area where your range extender is. Now, ensure that you have plugged in the Netgear extender and switched on the button. Once the power supply is proper the LED light will be lit. Make sure all the LED lights on your Netgear extender are well lit. It might have a PC to extender LED or Device to LED. If the lights are not lit, detach the ethernet cable from both ends and attach it again. Type in the extender’s default IP address i.e. 192.168.1.250 in your web browser’s address field. In case you are unable to access your extender then reset your web browser and try again. Establish a connection between your computer and the extender using an ethernet cable. Now allocate your computer system a static IP address. Ensure you note down the current default gateway. Utilize the IP address and subnet mask, 192.168.1.249 and 255.255.255.0 respectively.
On www.mywifiext.net setup you can easily set up and login into the Netgear extender’s login page. To proceed with the mywifiext.net login make sure you have noted down the correct login credentials for your Netgear extender. Make sure the network connection is stable and active for the login process to go on smoothly. Mywifiext.net setup has been made easy with the above steps. It is not a tough nut to crack so you can easily set up and log in with your Netgear extender login page.


The Wavlink Wi-Fi router setup wizard can be accessed using the default web address and the default router IP address as well.
The web address for accessing the router will be Wifi.wavlink.com.
When you enter the same in the address bar of your web browser, you will be redirected to the home page of the same.
If you are having trouble accessing the Wavlink router setup wizard, you can always restart your devices as the first resort.
If you need further information, you can always reach out to our team of experts to help you in the troubleshooting process.

Webroot antivirus is the wonderful security product which offers complete protection to your data and also helps in increase the speed of your device.
It runs in the background and can install via www.webroot.com/safe find the downloading key code for free 2021.
Keyboard Shortcuts to Speed up your Web Browsing: Jump up and down on a Web page:If the user wants to get through several pages of text on a web page, then they should press the space bar to jump down one page at a time.
Enter a new URL or Edit your current one:If the user wants to type in a new web address or they wanted to go to a different sub-page of the current website then you have to press Ctrl+L (Windows) or Cmd+L (Mac) to move up to your browser’s address bar.
This Keyboard shortcut will highlights the current URL so that you can make changes.
Zoom in and out on a page:If the user wants to see more or less detail on a website, then they have to press Ctrl+plus or Ctrl+minus on Windows (Cmd+plus and Cmd+minus on Mac) in order to zoom in or out on your current page.

Contact the mywifiextassist in order to set up the 192.168.1.250 new extender setup online.
We help you to resolve the extender’s issues and to avoid access errors, ensure that the IP address is not entered in the browser’s search bar.
You can configure your Netgear WiFi range extender in a hassle-free manner with the web address for installing a new extender.


This router provides the user with a range of high-speed Wi-Fi networks during the data transfer without any lags or troubles.
Orbi provides complete security, speed, and the better Wi-Fi reach in the different corners of your home.
Let’s proceed further and learn how you can set up the Netgear Orbi router for your home or office following some simple guidelines.Orbi Setup: Manual MethodConnect your Orbi Router to the internet.Connect the router to the modern.Once you have connected our device to the router, you need to turn it on.Now, open any web browser and type orbilogin.com in the address bar.
You are now successfully logged in.So, these are some simple guidelines you need to follow to set up your Orbi Router.
The above-mentioned steps belong to the manual method.
If you want to set up the Orbi router following the Wizard Setup method, follow the guidelines below:Wizard Setup MethodOpen any web browser on your computer and make sure that your device is connected to the Orbi Network.In the URL box, type orbilogin.com and hit the enter button.Here, you have to type the default login credentials to log in to the Orbi router.Type ‘admin’ in the username field and the ‘password’ in the password file.After this, you will see the Home page appearing on your screen.Go to the ‘Advanced’ settings and choose the ‘Setup Wizard’ option.Tap on the ‘Yes’ option and click on the ‘Next’ button.Login to the Orbi RouterAre you unable to access the Orbi login?