


Are you looking to add Google Analytics to WordPress? Want to know how people are finding your site, which blog posts are most popular, or how many of your visitors are using mobile devices?
All of that and much more can be easily found using Google Analytics and MonsterInsights.
In this article, we’ll show you why adding Google Analytics to your WordPress site is important.
Google Analytics + WordPress: The Basics
Google Analytics can measure many different metrics on a WordPress website. You can turn WordPress into just about any kind of website, and Google Analytics can track it. Check out web hosting support by Cloudways.
The way you use Google Analytics on WordPress will differ depending on what kind of website you have.
If you have a blog, maybe you’re most interested in which posts people are reading, how they found the posts (on social media? via Google search?), and if they’re clicking on ads or affiliate links.
If you have a business website, on the other hand, maybe you’re most interested in how many people are filling out your forms, how they’re finding your website, and which of your services are the most popular.
To add Google Analytics to any website to track your visitors’ behavior, you need to install the tracking code. The code should be placed just before the closing </head> tag in your header. For many people, this is not easy to do. Most WordPress website owners aren’t developers and don’t know how to work with code!
That’s where MonsterInsights comes in. Not only does the plugin make adding Google Analytics to WordPress a breeze with zero coding, but it also adds crucial tracking features to help you understand how people are using your website.
MonsterInsights seamlessly integrates with Google Analytics 4 (GA4), giving you the ability to view your GA4 reports in a super easy-to-understand way.
Video Tutorial
How to Add Google Analytics to WordPress
- Step 1: Download MonsterInsights
- Step 2: Sign in to Google
- Step 3: Create Google Analytics Property
- Step 4: Set up MonsterInsights
- Step 5: Adjust Enhanced Measurement & Data Retention Settings
Step 1: Download MonsterInsights
Normally, you’d have to insert your Google Analytics tracking code into your WordPress website’s code.
But with MonsterInsights, you don’t need to worry about using any code.
MonsterInsights is the best Google Analytics plugin for WordPress. It allows you to easily connect your WordPress site with Google Analytics so you can view all the data that matters most right in your WordPress dashboard.
Plus, with the click of a button, you can set up sophisticated tracking features such as event tracking, eCommerce tracking, form tracking, custom dimension tracking, outbound link tracking, and more.
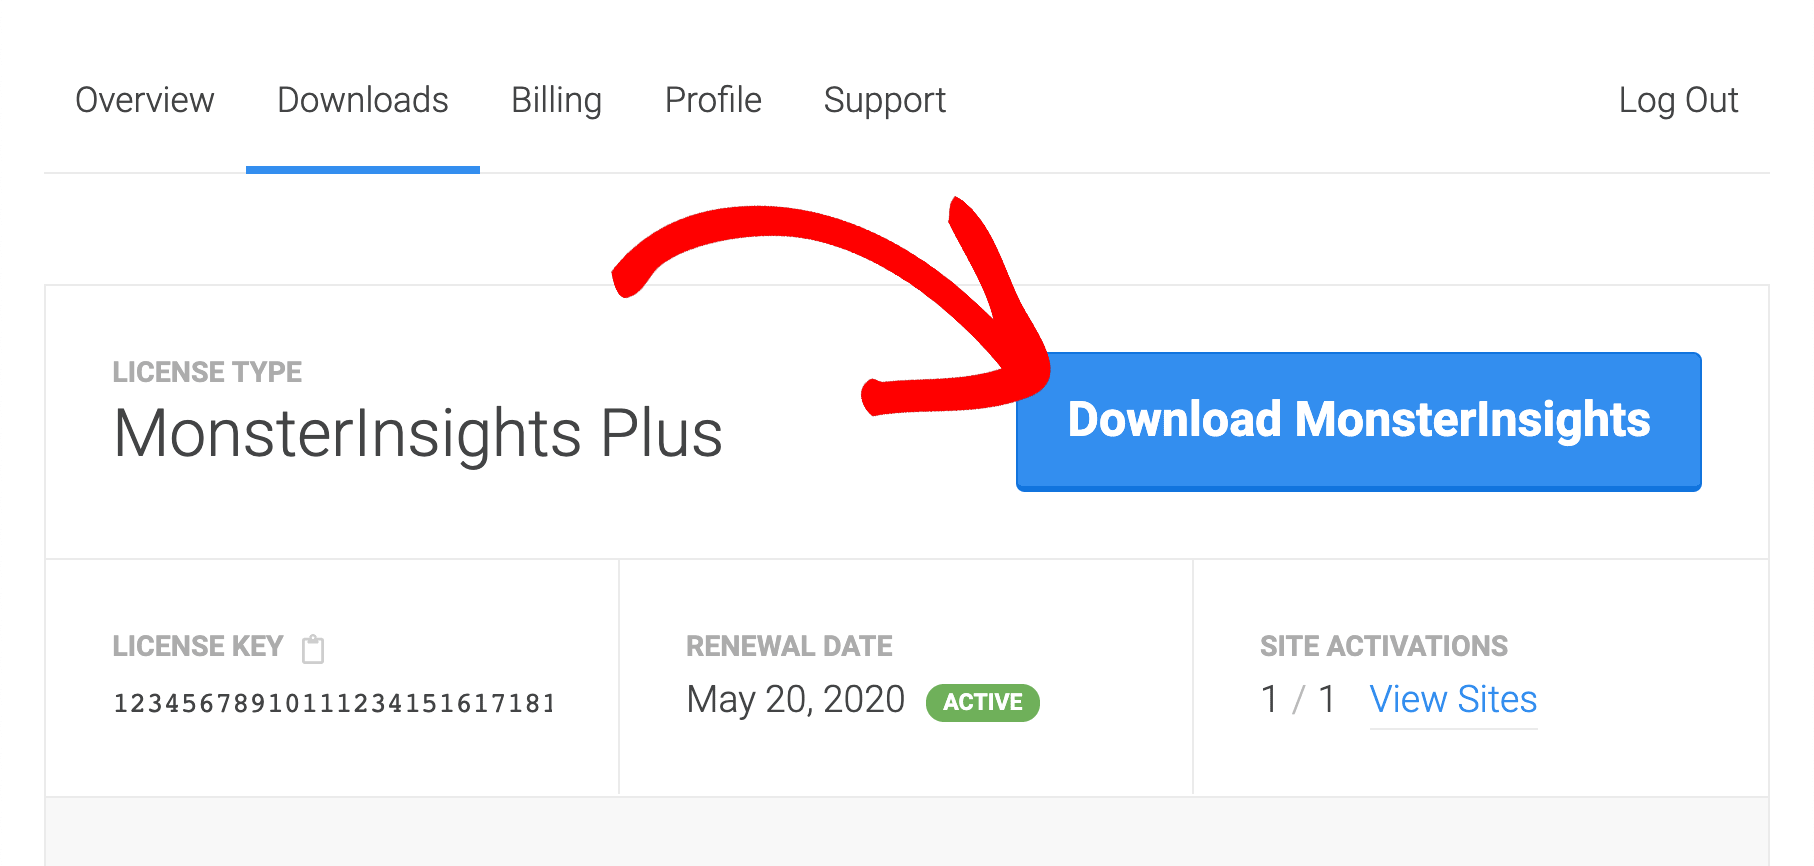
To get started, head to the Pricing page and choose the license level that’s best for your tracking needs. Once your license is active, download the plugin zip file from your account page.
Step 2: Sign In to Google
Now, you need to log in or sign up for a Google account.
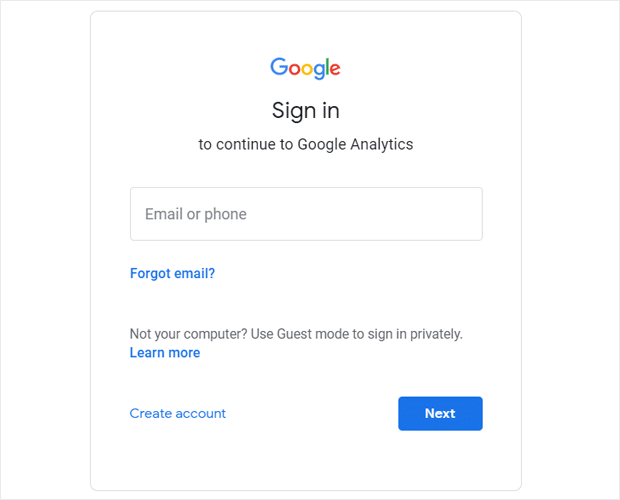
To get started, you’ll need to open the Google Analytics website and click the Sign in to Analytics link or Start for free button in the top right corner of the page.

Next, you can log in to your existing Google account if you have one, or click the Create account link to create a new Google account.
Step 3: Create a Google Analytics Property
After you’ve signed in to your Google account, click the Start measuring button on the next screen.
Now, you’ll need to enter the Account name for your Google Analytics account. You’ll also see different data sharing settings, make sure you check all the boxes and then click Next.

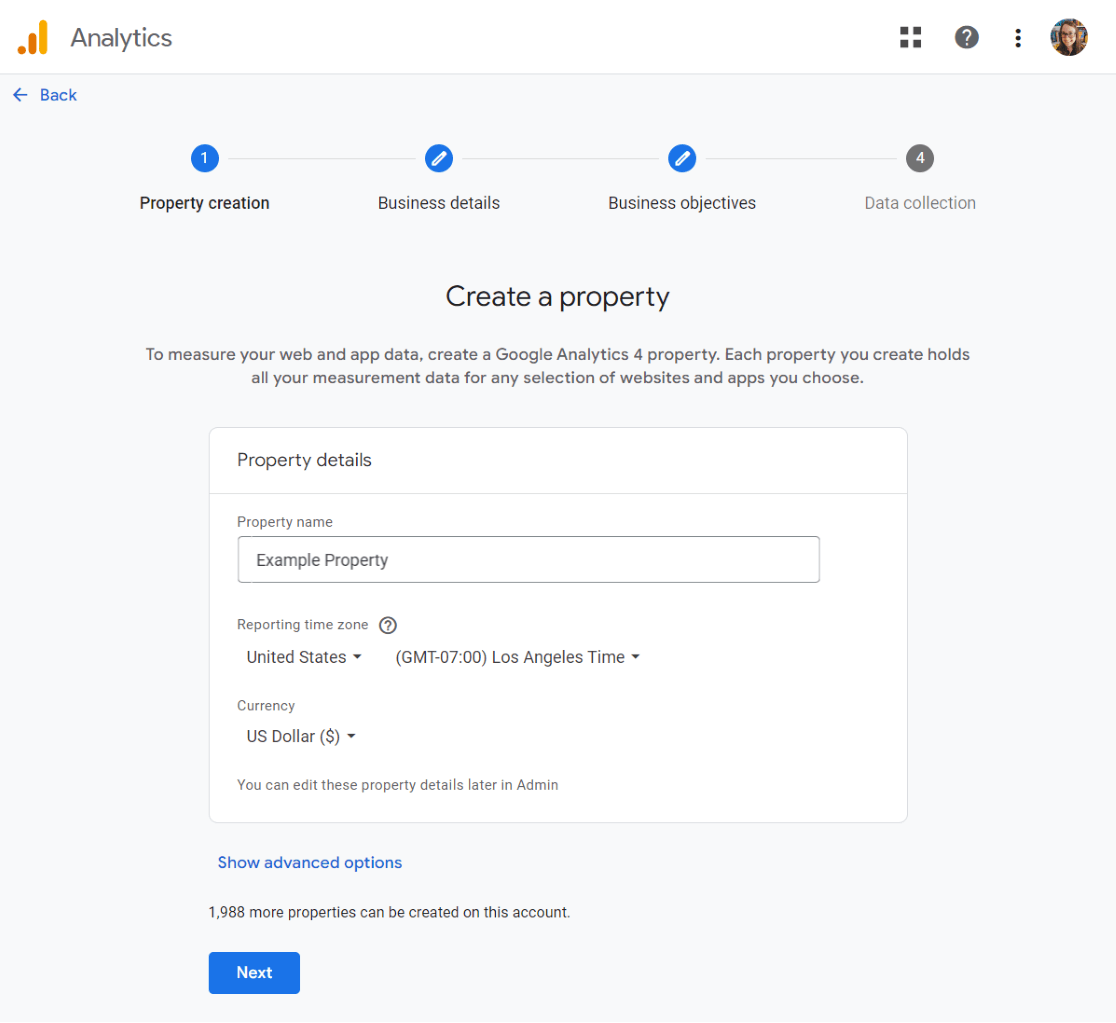
Now, you’ll have to enter the property details of your website. Start by entering a name, select a reporting time zone, and currency.
To set up a GA4 property, enter your property name, then choose your time zone and currency. Click Next.
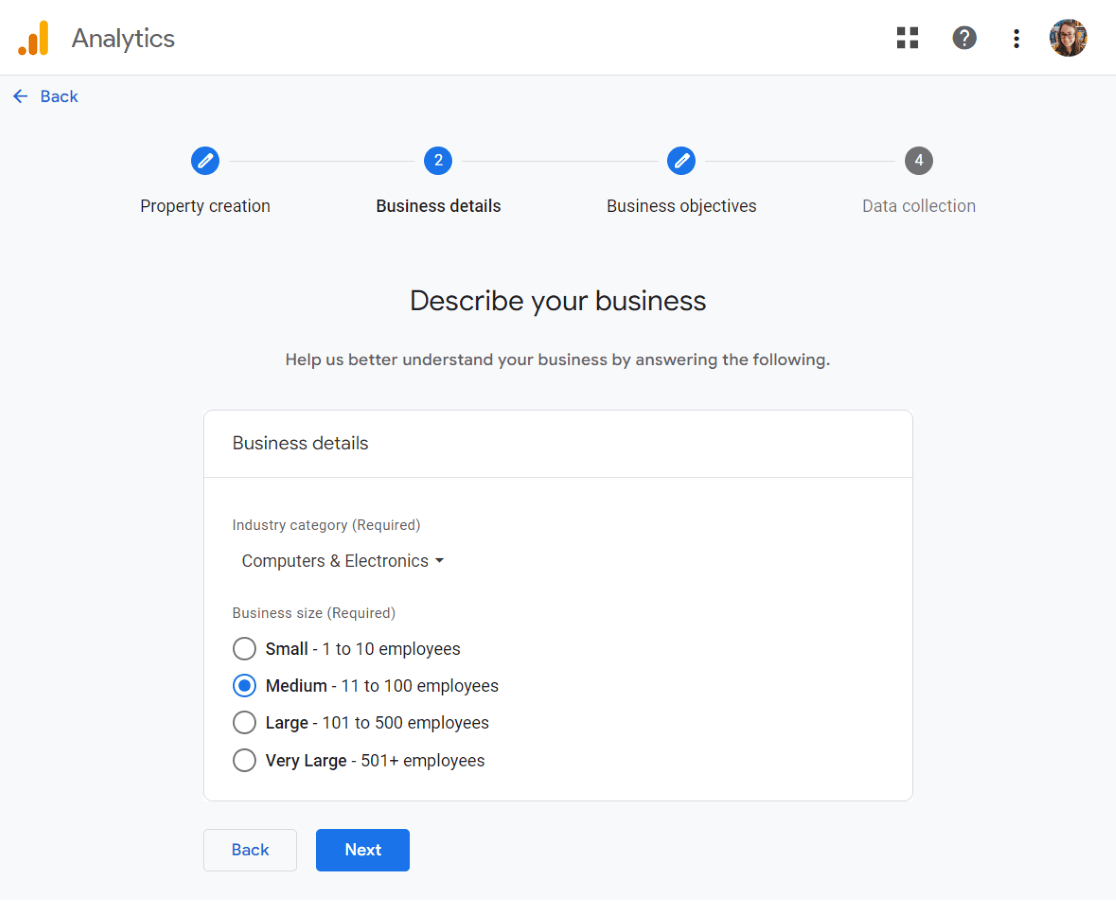
Choose your industry category and your business size, then click Next.
Finally, choose your business objectives. We suggest choosing Get baseline reports so that you get all of the Google Analytics reports populated in your account.
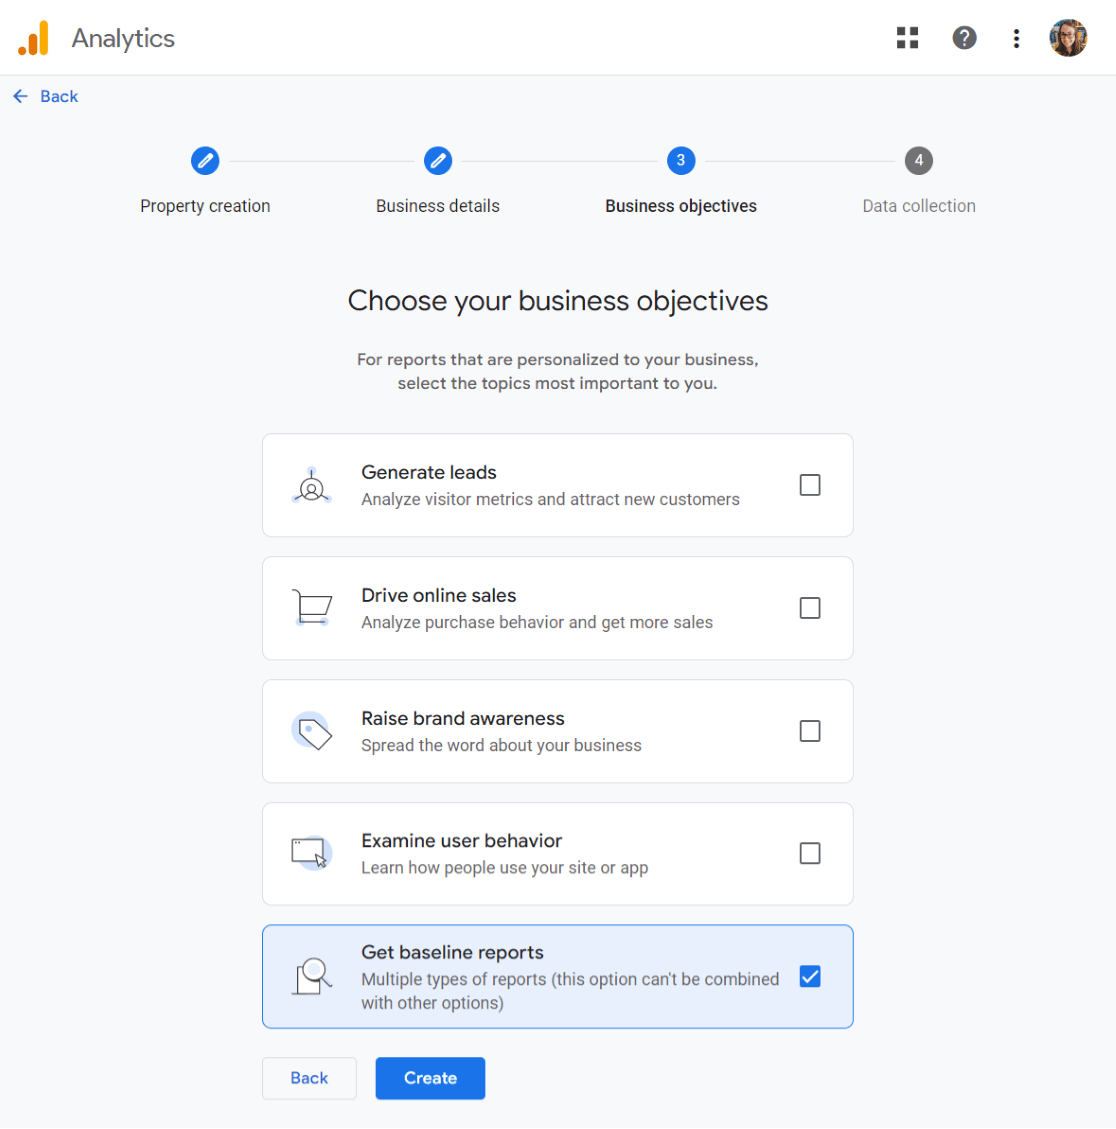
Click Create.
That’s it! You’re now signed up for Google Analytics. Next, we’ll add Google Analytics to WordPress.
Step 4: Set up MonsterInsights
Navigate to the site where you want to install MonsterInsights and go to the WordPress admin dashboard.
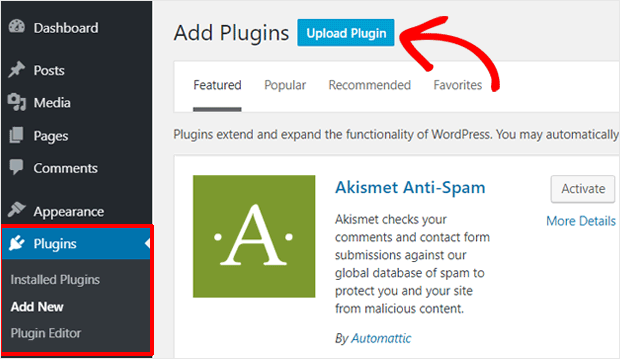
Then navigate to Plugins » Add New and click the Upload Plugin button at the top.
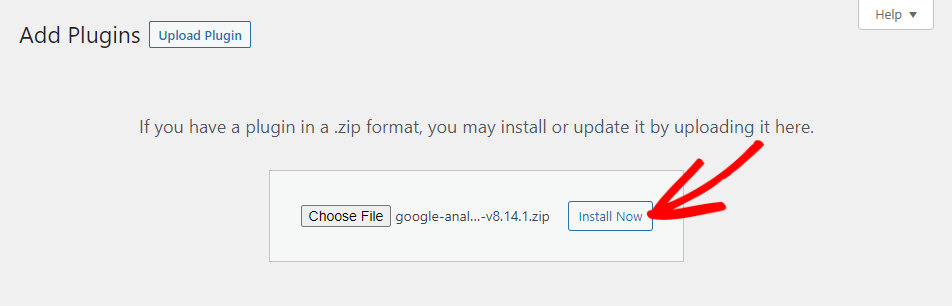
On the next screen, you can click the Choose File button to select the zip file you downloaded in step one. Then click the Install Now button to upload the file and install the plugin on your site.
Once the plugin has been uploaded and installed, you can click the Activate Plugin button to activate it on your site.

After the plugin is activated, the plugin setup wizard will open to guide you through the setup process step by step.
At first, you’ll see the ‘Welcome to MonsterInsights!’ message and options to choose the category of your website. There’re 3 options: Business website, Publisher (Blog), and eCommerce.

Select a category that best describes your website, and then click ‘Save and Continue’ button.
If you want to skip the setup wizard, for now, you can click ‘Exit Setup’ button at the top.
In the next screen, you’ll need to connect MonsterInsights plugin to your website by providing your license key.
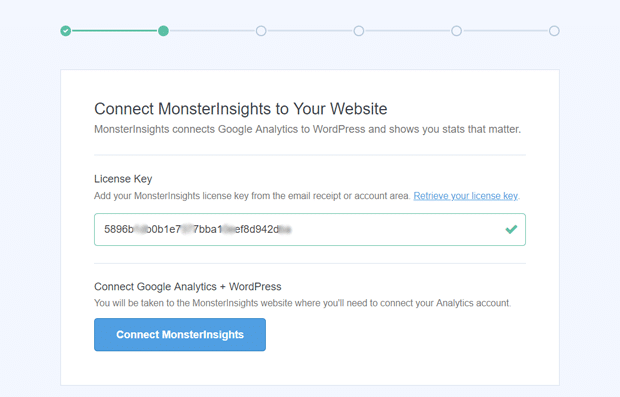
You can find your MonsterInsights license key in your email receipt or account area on the plugin website.
Once you enter your license key, it’ll verify your account, and then you can click on the ‘Connect MonsterInsights’ button.
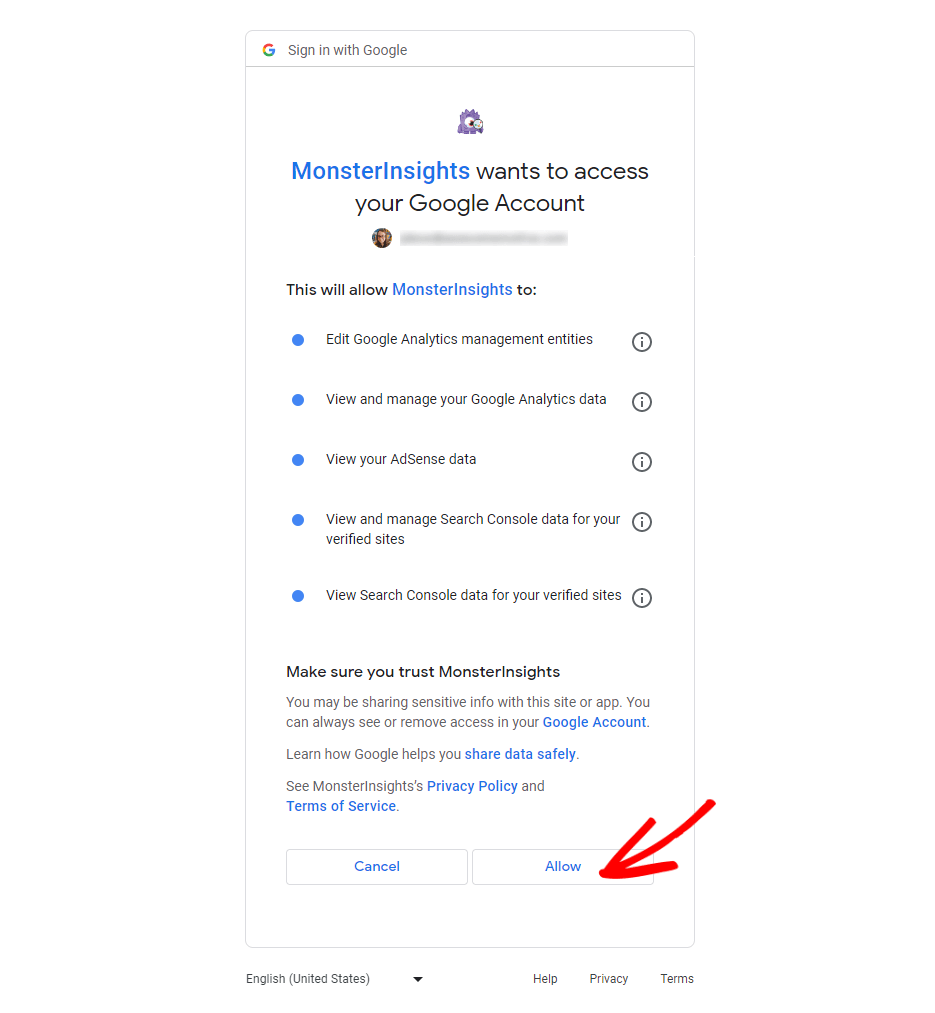
After that, you’ll see an option to connect your Google Analytics with your MonsterInsights account. Select your account to continue authentication.

Next, you’ll need to allow MonsterInsights the proper permissions.
After that, you’ll need to pick a profile to complete the connection. If you have multiple websites connected to your Google Analytics account, then you’ll need to choose the right website property here.
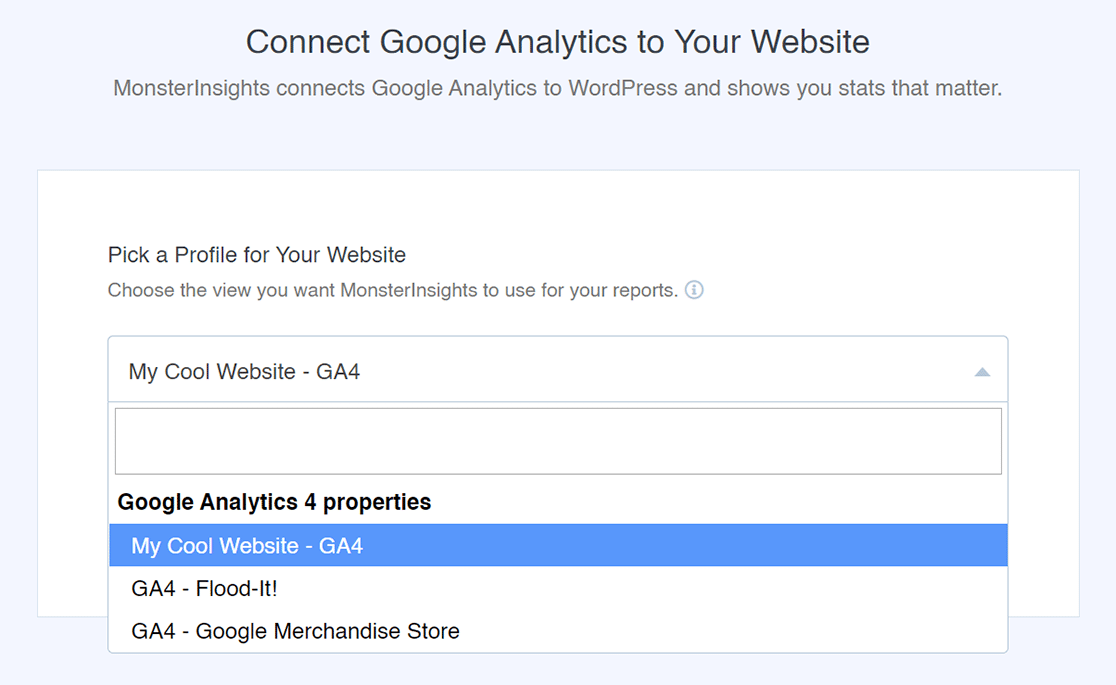
Choose your profile, and then click the ‘Complete Connection’ button.
After that, it’ll finalize the authentication process in a few seconds, and then take you back to your MonsterInsights setup page.
Now you can see recommended settings for the Google Analytics plugin.
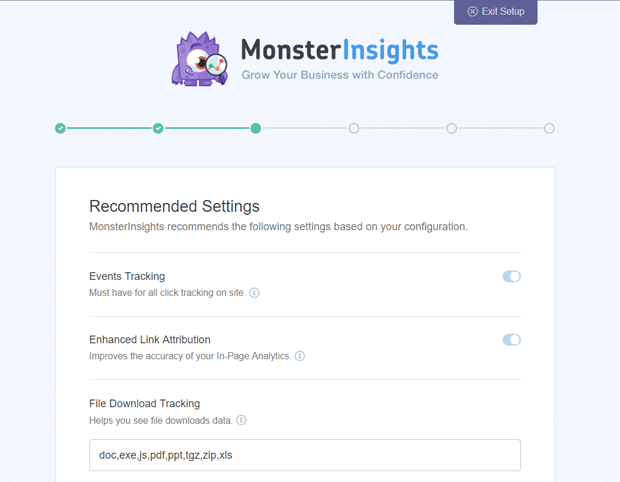
This page includes some of the most important settings as the following:
- Events tracking – Enabled by default.
- Enhanced Link Attribution – Enabled by default.
- File Download Tracking – Most used file types (doc, exe, js, pdf, ppt, tgz, zip, xls) added by default.
As you scroll down, you’ll see more settings.
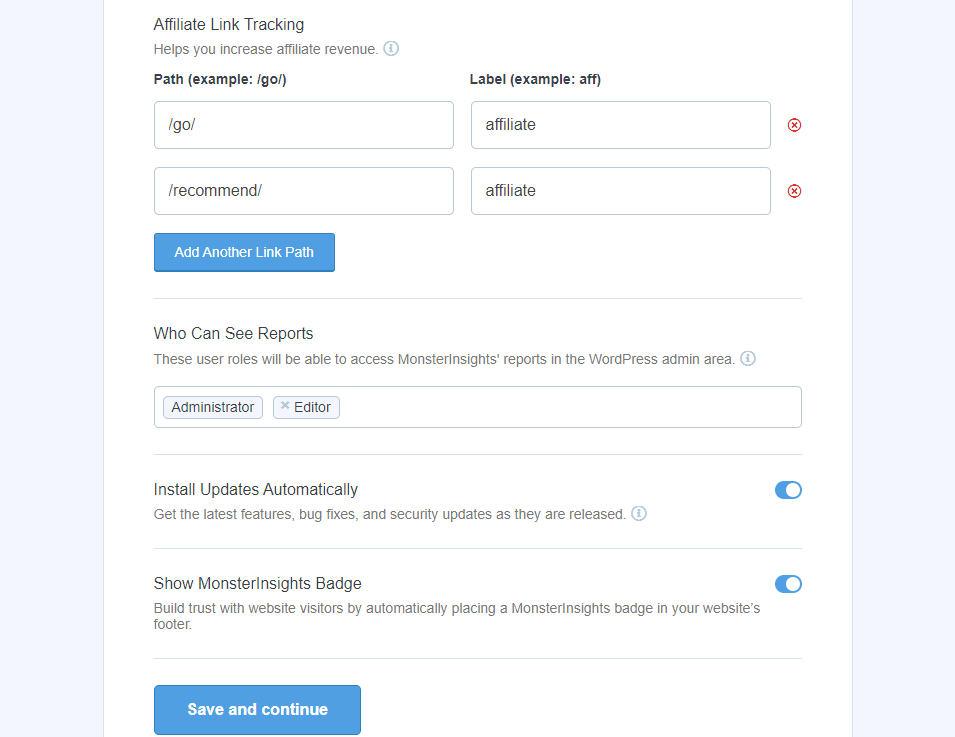
- Affiliate Link Tracking – It has 2 affiliate link paths added by default, and lets you add more affiliate link paths.
- Access to MonsterInsights Reports – You can choose who can see the MonsterInsights reports.
- Automatic Plugin Updates – You can enable or disable the option to install updates automatically.
- Show MonsterInsights Badge – Choose whether or not you want to show a MonsterInsights badge in your website’s footer. You’ll be able to access a few options for how this looks later.
Review and configure these recommended settings, and then click the ‘Save and Continue’ button at the end.
On the next screen, you’ll see options for even more tracking options, addons, and helpful plugins.
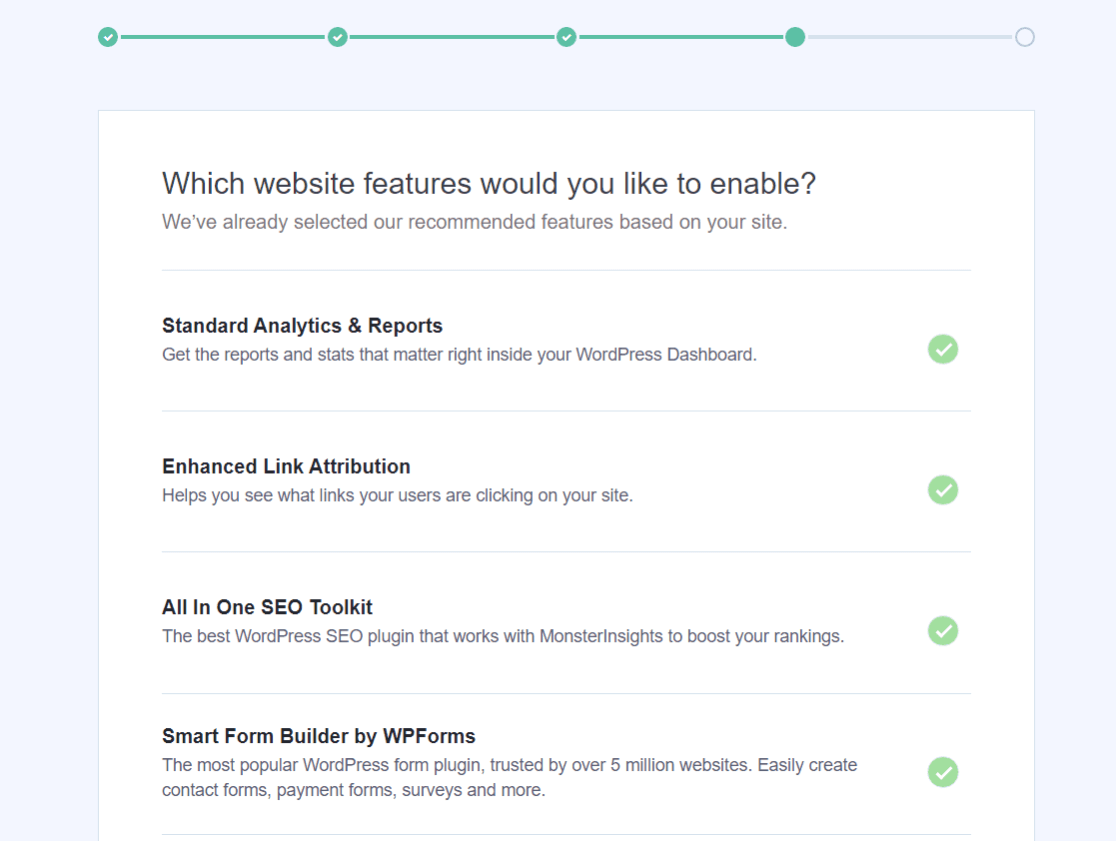
The first four items are:
- Standard Analytics & Reports – The standard MonsterInsights reports you’ll get in your WordPress dashboard.
- Enhanced Link Attribution – Can help you see where users are clicking on your site.
- All in One SEO Toolkit – The best WordPress SEO plugin that integrates with MonsterInsights
- Smart Form Builder by WPForms – The most popular WordPress form builder plugin
When you scroll down, you’ll find even more options:
- Privacy Compliance Addon – Helps Google Analytics become compliant for GDPR, CCPA, and more
- Advanced Reports – Get access to advanced reports inside MonsterInsights, such as search keywords, a real-time report, publishers and eCommerce reports, and more
- eCommerce Tracking – Instantly enable eCommerce tracking
- 20+ Advanced Tracking – Even more advanced tracking, such as author tracking, form conversion tracking, scroll tracking, and more
- Advanced Growth Tools – Get access to our campaign URL builder, popular posts addon, and A/B testing integration.
- Media Tracking – Enable embedded video tracking. See how many times videos are watched, how far they were watched on average, and more.
After that, you’ll see a new screen with this message ‘Awesome! Tracking and Analytics are All Setup’. It means the setup process is complete, and you’ve successfully installed Google Analytics in your WordPress site.
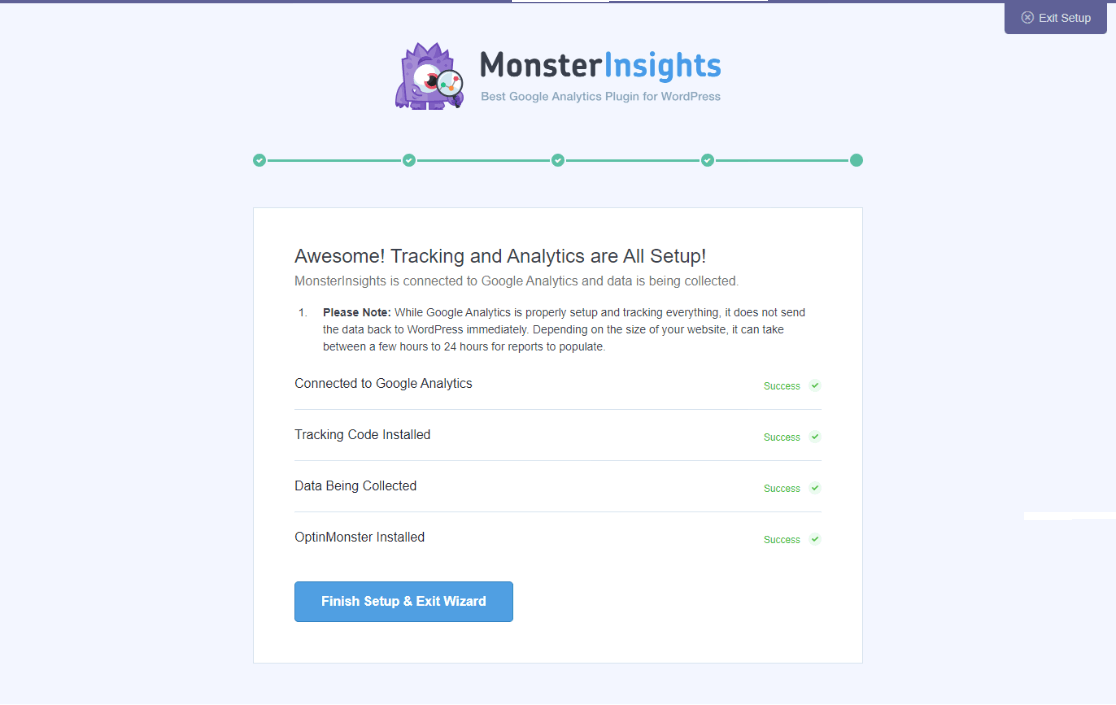
This screen also notifies you about when you can start seeing your website reports. Depending on the size of your website, it can take between a few hours to 24 hours. Don’t forget to click on the ‘Finish Setup & Exit Wizard’ button.
Step 5: Adjust Enhanced Measurement & Data Retention Settings
Turn Off Enhanced Measurement
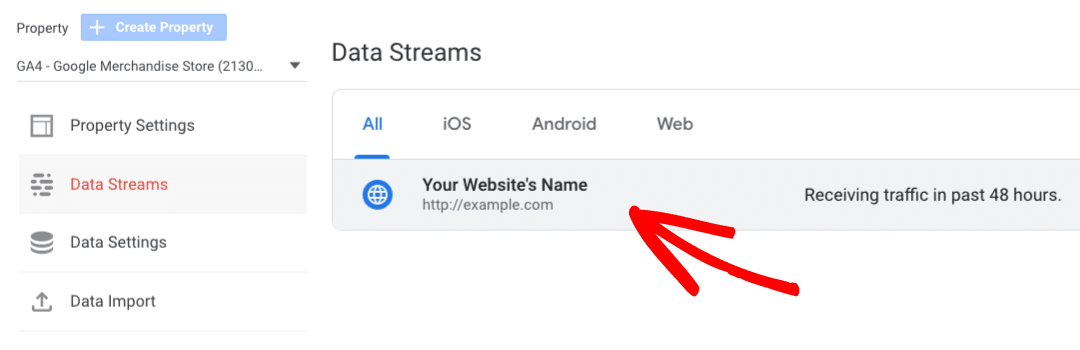
If you created your own Data Stream in GA4 (instead of letting MonsterInsights create one automatically), then you’ll need to turn off Enhanced Measurement. To do that, go to Admin » Data Streams, then click on your data stream:
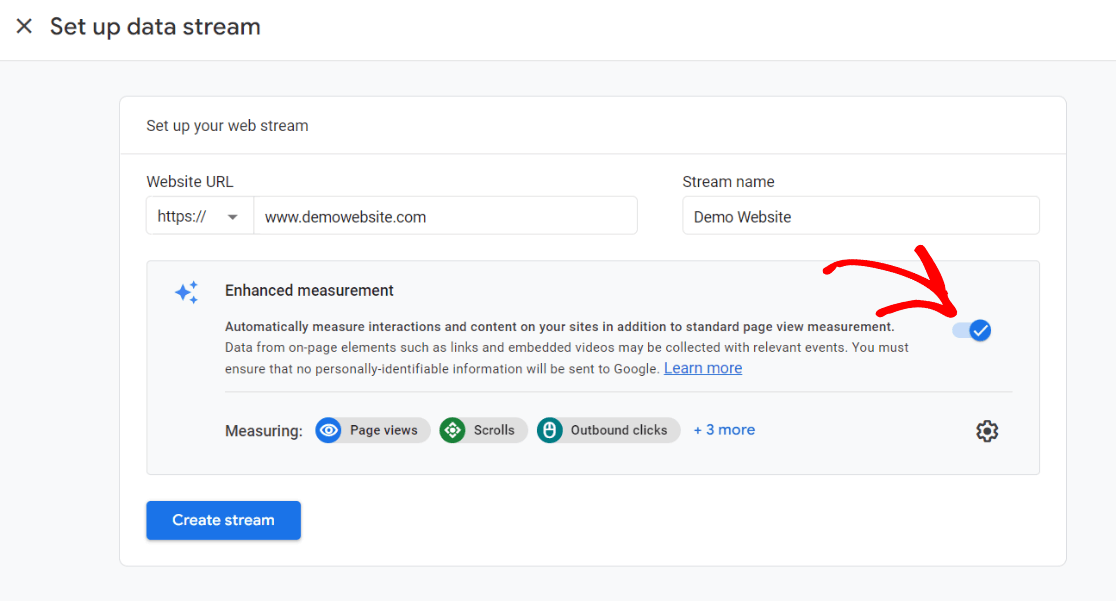
Now, click on the switch to turn off Enhanced measurement.
After clicking the switch, a message will pop up asking if you’re sure you want to turn it off. Click Turn off.
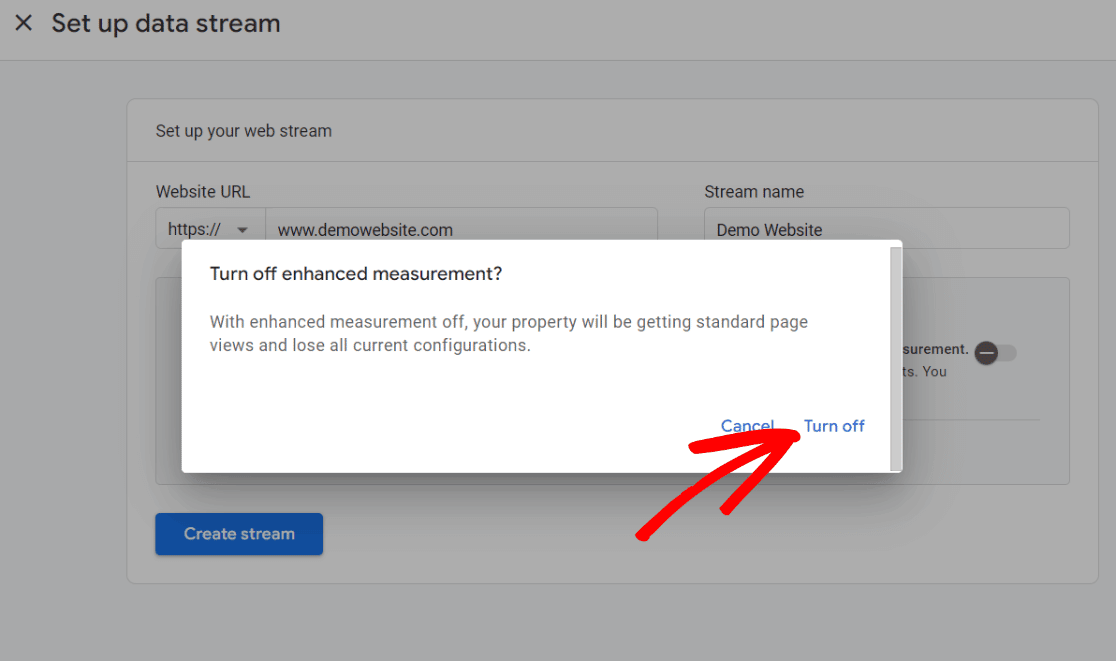
Make sure you don’t have enhanced measurement on! MonsterInsights adds a lot of custom enhanced tracking, and leaving this on can actually result in skewed, incorrect data.
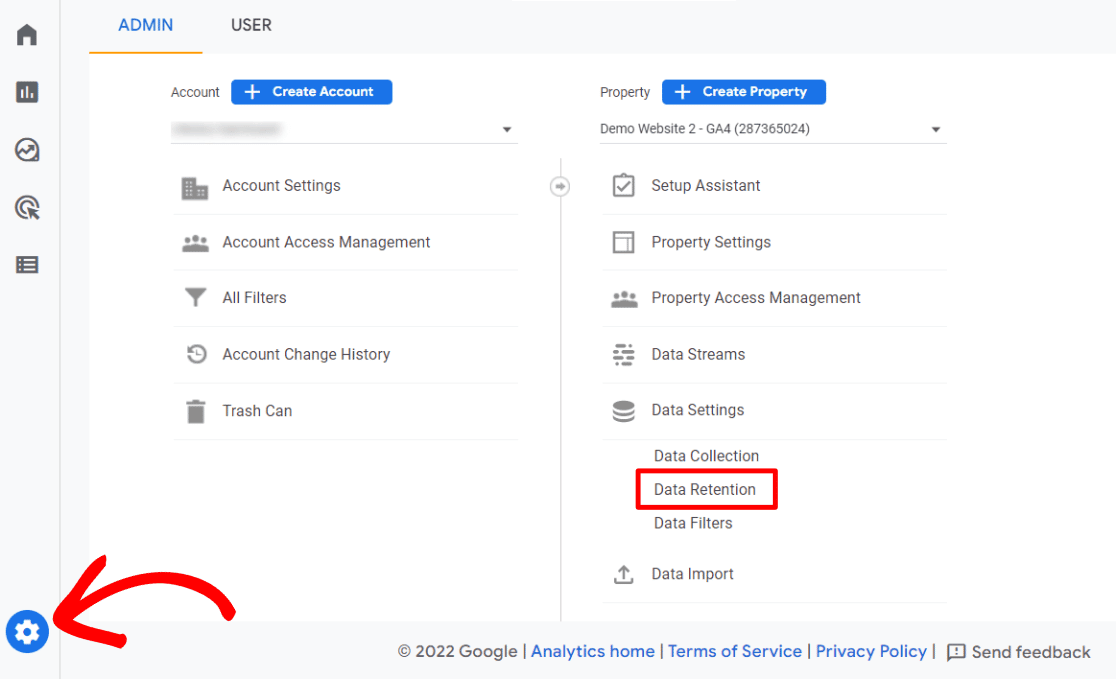
Change Data Retention Settings
By default, your data retention settings will be set to 2 months. If you want to be able to use your data in custom reports beyond 2 months (which most people do), go to Admin » Data Settings » Data Retention:
Now, use the dropdown to change your settings to 14 months:
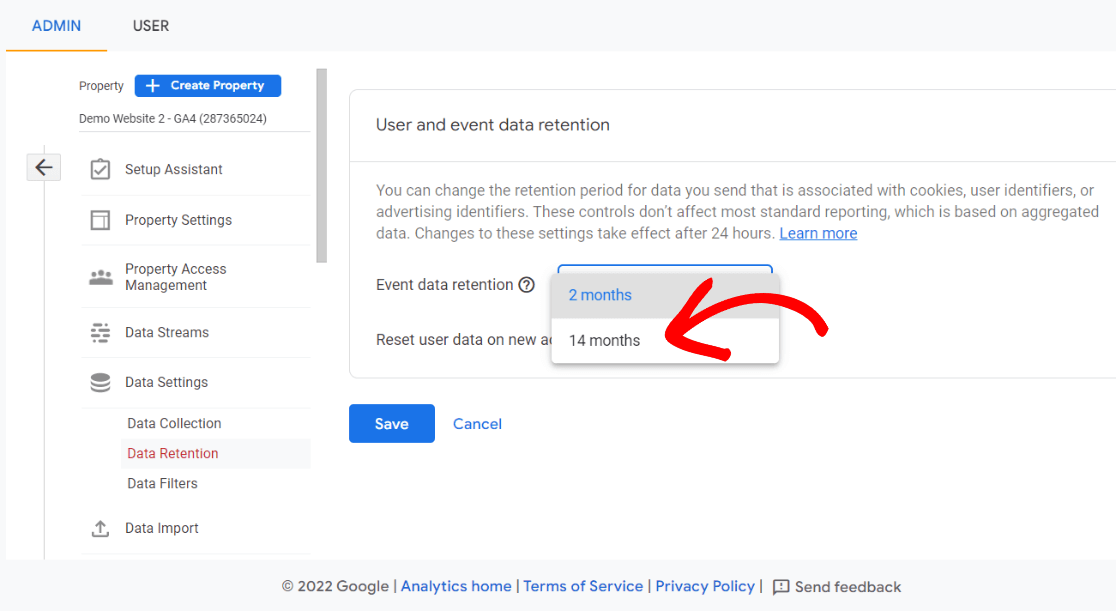
That’s it! You’ve successfully added Google Analytics to WordPress the right way.
View Your Google Analytics Metrics in Your Dashboard
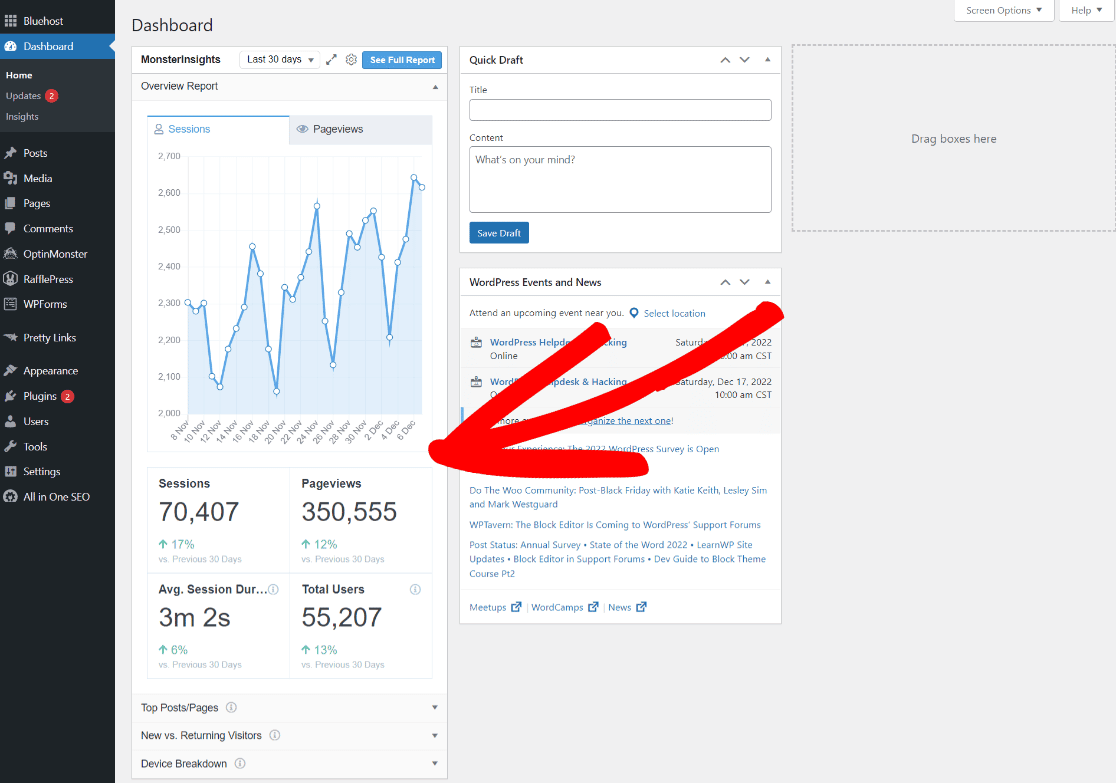
As we mentioned above, it can take a few hours for Google Analytics to start collecting data. Wait for some time, and then you’ll be able to view your WordPress website reports right inside your WordPress dashboard.
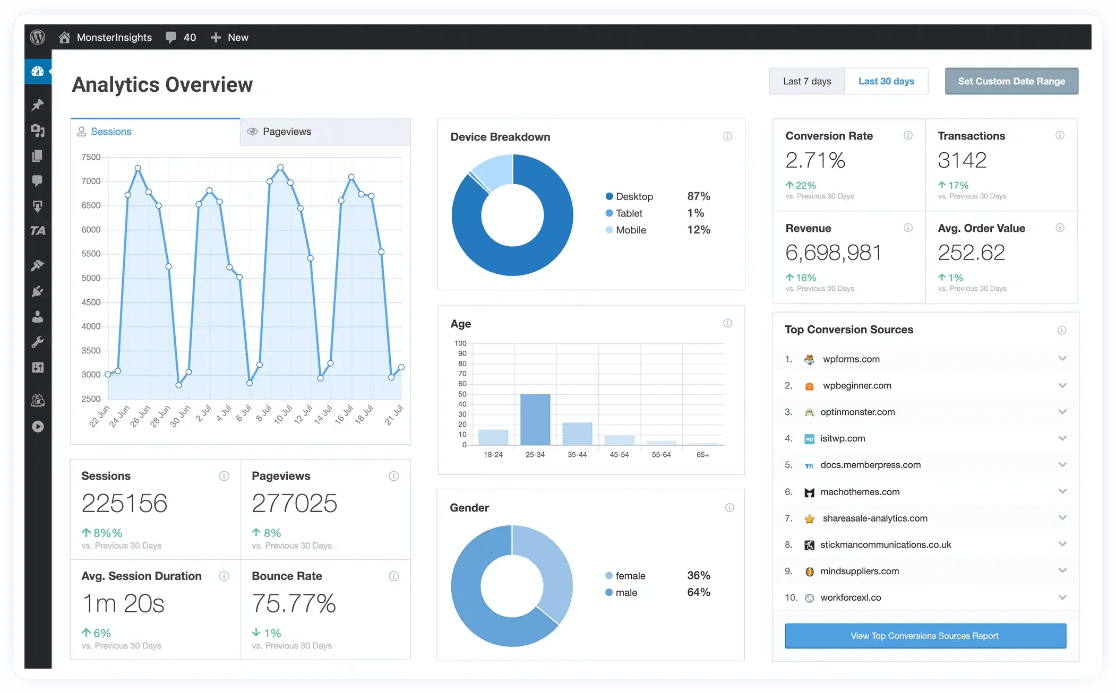
A quick summary of the website analytics report is available in MonsterInsights’ dashboard widget.
To view the full reports, you’ll need to visit Insights » Reports from your dashboard. There, you’ll see the overview report first.
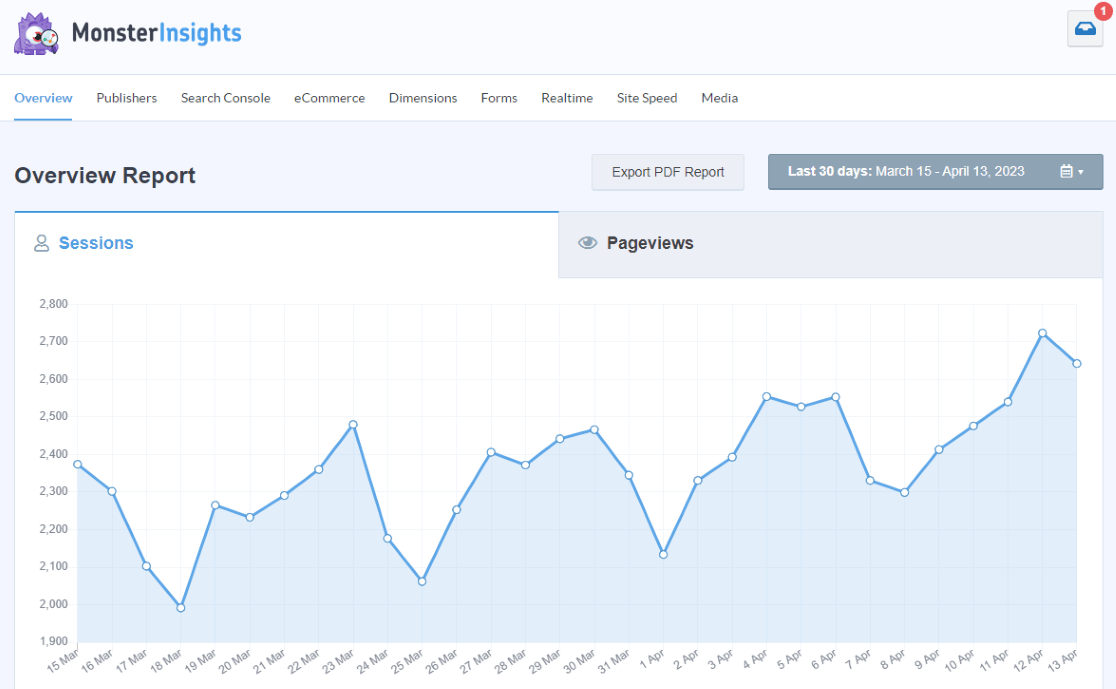
Then, you can view all the other reports by clicking on the tabs/links at the top of the report. Here’re just a few types of data you can track using MonsterInsights’ plugin:
- Top landing pages: Which landing pages are most popular on your site
- Link and button click tracking: Which links and buttons are getting the most clicks
- Search Console report: What keywords people are using to come to your site
- Forms tracking: Which forms are getting the most impressions and submissions
- Media tracking: Which of your videos are getting watched and how long people are watching them
Also, you can track advanced metrics like eCommerce transactions and custom dimensions easily with MonsterInsights.
In conclusion, MonsterInsights makes it super easy to add Google Analytics to WordPress, set up advanced tracking, make your site GDPR compliant, and view reports.
For a full tour of MonsterInsights, check out Your Ultimate Guide to MonsterInsights Dashboard Reports.
Add Google Analytics to WordPress without Coding
Google Analytics for WordPress FAQ
How do you add the Google Analytics WordPress plugin?
Follow these 4 steps:
- Download MonsterInsights
- Create a Google Analytics account or sign into your existing account
- Install the MonsterInsights plugin via your WordPress dashboard and follow the setup wizard
- Adjust your data retention settings
How do you add Google Analytics to WordPress without a plugin?
To set up Google Analytics on WordPress without a plugin, you’ll need to add the Google Analytics code to the header file, right before the closing </head> tag. For a full tutorial, check out Add Google Analytics to WordPress WITHOUT a Plugin.
Can I add Google Analytics to WordPress for free?
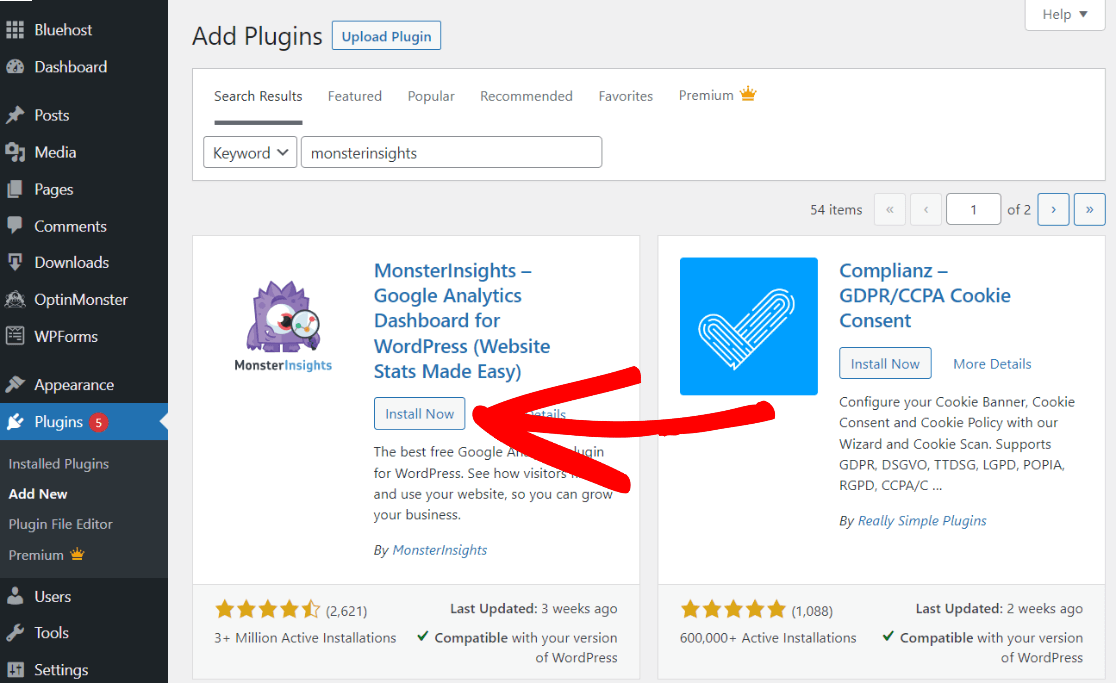
Yes! Install the free version of MonsterInsights by searching for “MonsterInsights” in your WordPress dashboard under Plugins » Add New.
We hope this tutorial helped you to set up Google Analytics with MonsterInsights. You may also want to see our guides on is MonsterInsights worth it and how to add a simple contact form to WordPress.


Are you in search of an addition or alternative to Google Analytics?
Of course, but you are probably concerned about privacy, or possibly overwhelmed by how we can use Analytics.
Contact us today.For more, visit - https://appsshoppy.com/5-impactful-google-analytics-alternatives/


If you’re looking to improve user experience and search visibility for your website, the following Google services can certainly help.
Google My Business is a free and easy-to-use service for businesses and organizations to manage their information across Google.
You’ll have to verify ownership by entering a code that is either sent to you via mail or phone text.
You’ve probably noticed the section on the right side of the search results which provides information for businesses related to your search query.
42% of businesses which add photos receive more requests for directions and 35% more click-throughs to their websites.
These insights can provide further data on how people are finding your business, phone clicks and number of queries made which resulted in your business displaying in the search results or maps.


There are many ways to monitor analytics on your Google Ad campaigns and it’s great to have them on hand to know which of them are performing well and which ones need a boost.
Analytics provides in-depth reporting on how people use your website and ads.


