


Are you here to learn how to use Cricut EasyPress Mini? We’ve got your back! Ever since Cricut launched its mini heat press, I couldn’t resist buying it. This cute small gadget is capable of doing a lot of great things for your small projects, like wine bags, hats, yoga blocks, socks, baby bandanas, and even face masks. But, do you know, I have made hundreds of items over the last two years?
Hence, I am excited to share a project that I created as a gift for my closest friend on her birthday. She is a shoe lover and likes to try different types of shoes. With this in mind, I added a small yellow flower to the white shoes. Want to know how I made it? Let’s visit the blog to learn. Prior to that, I will also talk about the features of EasyPress Mini.
Key Features of Cricut EasyPress Mini
Before I tell you how to use Cricut EasyPress Mini, let me tell you about the major features of this machine:
- Compact and small in size
- A sharp, pointed edge, allowing it to move hard-to-reach area
- Ceramic-coated heat plate suitable for even, dry heat distributions like other EasyPress
- There are three heat settings are available for foil/delicate: regular Iron-on, and Infusible Ink
- The base is also insulated, making it easier for you to rest the Mini when hot
- There is an auto-shutoff feature, so you don’t need to worry if you forget to turn it off
These are the key features that you will find in your machine. Now, let me take you to the supplies I used for making the beautiful shoes.
Essential Supplies Required to Create Custom Shoes
When I unboxed my new mini press, I mainly got three items in the box. They were EasyPress Mini, safety base, and instructions. Here are the essential supplies I have used on shoes:
- Iron-on Protective Sheet
- Cricut EasyPress Mini
- Cricut Explore Air 2 (or other Cricut machine)
- Cricut Iron-on (gold and yellow)
- Canvas shoes
- Weeding tools (optional)
- Scissors
- Towel
From the above supplies, you are familiar with the supplies needed for shoes. Now, let us shift our focus to the tutorial on EasyPress Mini to beautify these white shoes.
How to Use Cricut EasyPress Mini on Shoes?
I was very well aware of the fact that If I had used this press machine on my shoes or even a household iron, then I would have ruined the shoes. Hence, I decided to buy this press machine that is available at an affordable price. This press is specially designed for small projects, and it can apply heat anywhere we want. So, let me show you how I made these custom shoes using this mini-press and iron-on.

Step 1: Get Ready With Your Design
In the first step, you have to decide the design you want to add to your shoes. Since I wanted to add a yellow colored sunflower, I chose the design and adjusted the size in Design Space that fit my blank shoes.
Step 2: Cutting the Design
After I chose the design and adjusted it according to the shoe size, I sent the file to the Cricut machine to cut. For cutting, I used my Cricut Joy, as it is ideal for smaller projects. However, if you have chosen the same design, then you can cut as many flowers as you want.
Step 3: Weed Out Your Design
After cutting, I weeded the design using a weeding tool. Since the size of the sunflower was too small, I preferred to take the help of a weeding tool. Also, I would recommend you to use the same for all intricate designs.
Step 4: Set the Temperature for Your Iron-on
EasyPress has three heat settings: low, medium, and high. However, for iron-on materials, you have to select the temperature according to the fabric you are using. For this project, I am using medium heat settings. In addition, you can navigate to the Cricut EasyPress Mini Heat Guide for the temperature settings offered by Cricut.
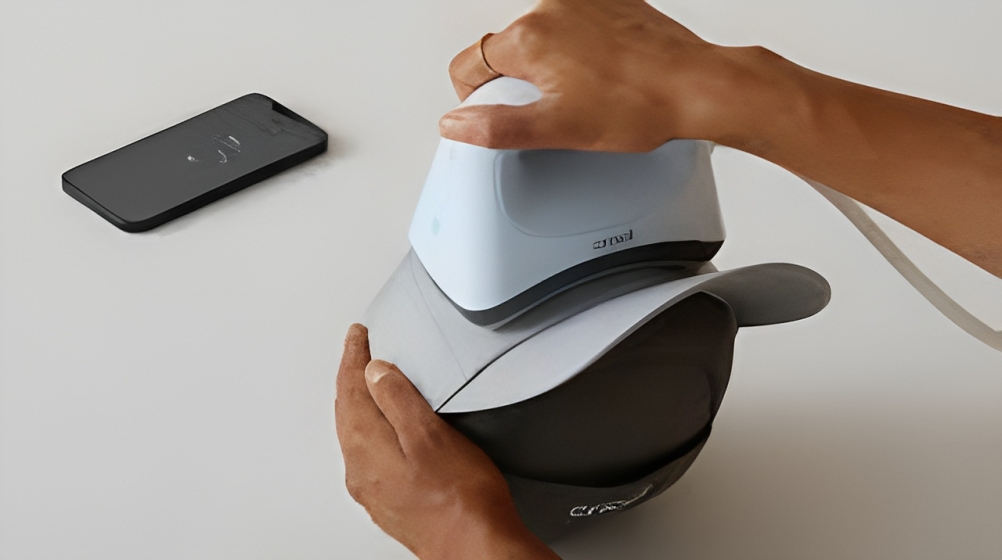
Step 5: Apply the Heat to Your Shoes
Before applying the heat, I added a towel inside the shoes so that I could press against something easily. Then, place the iron on and follow the time instructions according to the heat guide. One more thing: This press machine doesn’t come with a timer, so you will need one. So, set the timer on your phone. After you place the iron-on design, you have to use the press on the center of the flower. After pressing, just remove the carrier sheet.
Since the shoe’s surface was round, I had to apply more effort from every side. See what it looks like! Finally, you have learned how to use Cricut EasyPress Mini.
FAQs
Question 1: Can I use my Cricut EasyPress Mini for T-shirts?
Answer: The Cricut EasyPress and EasyPress Mini are compact devices that come with a flat surface. It can be heated to a precise temperature required for your projects. Although both the devices have a super-smooth surface. The only difference you will notice is its size. Hence, I believe EasyPress is ideal for large surfaces such as t-shirts and tote bags, while the EasyPress Mini is perfect for small, intricate projects. But, still, if you want to use EasyPress, then you can do so if your design is small.
Question 2: What settings do I need to use to make projects with Cricut EasyPress Mini?
Answer: The EasyPress Mini comes with three heat settings: Low, Medium, and High. You can also refer to the recommended times and temperatures for your projects to ensure the best results. Here are the recommended settings for different fabrics and materials:
- Low: Suitable for lightweight, delicate, synthetic, or heat-sensitive fabrics. It’s also great for more delicate heat-transfer vinyl, such as Foil Iron-On.
- Medium: Apt for most fabrics and heat-transfer vinyl.
- High: Use the High setting for Infusible Ink projects and blanks.
Question 3: What is the recommended size for a design to transfer using Cricut EasyPress Mini?
Answer: The EasyPress Mini is an ideal tool for transferring small designs onto unique objects. Plus, it performs really well in areas that are hard to reach. It is capable of covering the smallest area to reach with accuracy a place that is about 2 times the heat plate.
- For iron-on transfers, the maximum size is 4” W x 3.5” L or 1.7” W x 5.25” L.
- For Infusible Ink – 2.75” W x 2.75” L or 1.625” W x 5” L.
Final Words
Once you use the press machine, you will love to use it again for customizing various projects such as tote bags, caps, shoes, hats, T-shirt designs, and many more. Whether it is your shoes or stuffed animals, everything is possible with this mini-press. In this how to use Cricut EasyPress Mini guide, I have not only focused on the tutorial but also the features of this product. Despite that, there are some supplies you will need to start with your mini machine. Now, add creativity to your project using this mini-press.
Source Url :- Easypress mini
Visit here for more Information :- cricut machine setup


