


![How to Make Stickers With Cricut Joy? [Full Tutorial]](https://mannydesignspace.com/upload/blog/662f8707e9780how-to-make-stickers-with-cricut-joy-full-tutorial.webp)
Do you want to learn how to make stickers with Cricut Joy and start your own business? If yes! Then we are in the same boat. I've been creating custom-made stickers with this craft machine for my loved ones. As a New Year resolution, I am going to create stickers and start my own business by selling them in my local area. Since it's a festive time, everyone is searching for attractive items to decorate their house.


It's not only me, but also my family members who can't hold their excitement of decorating the house with the personalized stickers made by me with the Joy cutting machine. If you are looking forward to utilizing your crafting skills, then stick to this till the very end. I am going to share with you the complete process revolving around creating a DIY sticker with this machine.
Step 1: Design Your Stickers in Cricut App
I am going to start how to make stickers with Cricut Joy by logging in to my Cricut Design Space with my login credentials. After that, you need to press the New Project option, and a new canvas will open. At the canvas, press the Shapes tool and choose the shape of your choice.

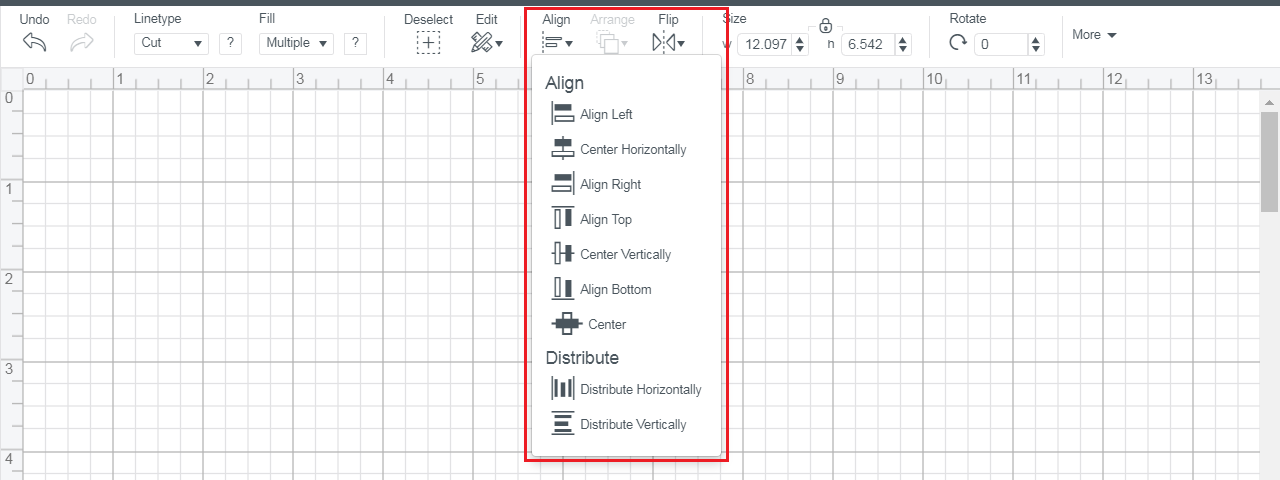
After choosing the shape, you need to resize it as per the requirements and press the Duplicate option under the Layers panel. Now, you need to place the designs side-by-side and select them together. After selecting them, go to the Align section and tick the Distribute Horizontally option.
Following this, you need to press the Attach button given at the bottom right side of your canvas. Next, change the color of your personalized sticker by changing the color from the Color box.
After doing the modifications, you need to select the stickers and then press the Duplicate option. Following this, cover the whole row of the stickers and choose Align Right > Align Vertical for proper formatting.
After completing the design, you need to tap the Make It option given at the top right side of your canvas.
Step 2: Cut Out Stickers With Joy Machine
Now, you need to select the On Mat option and then press the Done box visible on your device screen. After that, enter the total number of copies inside the Project Copies blank using the arrows. Next, click the Continue option, choose your material from the Browse All Materials list, and hit the Done button.
Equally important, place your material on the top of the Cricut cutting mat and put it inside your Joy machine. Now, press the Go button, and your machine will start cutting material as per the instructions given to it. Hopefully, you understood how to make stickers with Cricut Joy. But you must follow one more step before finishing your project.
Step 3: Take Off Extra Material From Mat
After the cutting process comes to an end, unload the mat from the machine and start removing the material from the mat. For a successful peel-off, you need to grab one side of the sheet and start peeling off the extra material from the mat. Be very gentle while removing the material, and detach the complicated material from the design with the weeding tool.
Step 4: Enjoy Your DIY Stickers
In the last step of how to make stickers with Cricut Joy, you can now use the stickers wherever you want. It will be your choice whether you wish to use them by sticking them on a calendar, envelope, diary, or journal. You just need to peel them off and stick them on the surface.
That's all today; it's time for you to unwrap your Cricut Joy supplies and start creating tons of stickers. It seems to be a long process, but honestly, you are going to love the final result at the end.
FAQs
Question: How to Make Custom Stickers With Cricut Joy?
Answer: The steps that will help you make custom stickers with the Joy machine are as follows:
- First, you need to login at Cricut Design Space with your login details.
- After that, create your design on the canvas using the tools.
- Now, choose the material and set the material on the Cricut mat.
- Next, start your Joy machine and wait till the cutting process is going on.
- Afterward, weed out your design from the mat with your wedding tool.
- Lastly, stick your sticker on notebooks or your school books.
Question: Do I Need to Have Design Space to Create Stickers With Cricut?
Answer: Yes, you all must download and install Cricut Design Space to make custom-made stickers with the Joy cutting machine. The app offers various kinds of images, fonts and ready-to-make projects that will help you in making the design as per your choice. Other than that, the app also offers a Cricut Access plan where you will find multiple files for your projects.
Question: What Supplies Do I Need to Create Custom Stickers?
Answer: In order to make custom-made stickers for personal or professional reasons, you need to buy the essential supplies. You need to ensure that all the supplies have been used properly without any damage. The list of the supplies that will help the user in forming this project is as follows:
- Cricut Joy cutting machine
- Cutting Mat
- Cricut Design Space
- Cricut Materials
- Weeding Tool
Read more: cricut.com/setup mac
install cricut design space app
Source: Cricut cutting mat


