


Wall Putty and its best way to utilize it for better result
“Respect the masterpiece. It is true reverence to man. There is no quality so great, none so much needed now” - Frank Lloyd Wright
How to start the process of home designing and renovation? Nah, Not only hiring contractor … and there is no chance leaving everything to others, Not like you make it, will see at the end of the job done.
It is a wonderful moment when your friends and guest complement the finesse and finish of home design and colors on your wall.
Notwithstanding, to accomplish an immaculate completion on the walls of your dream abode, you should invest both energy and time to achieve the best result of painting and setting the perfect vibe for your home.
Many people think that perfect paint selection or best paint from the market is enough for a perfect and flawless wall finish.
Truth must be told, there is much more work to achieve the best wall finish instead best paint. Wall putty and surface preparation for the paint is the process that gives the ultimate beauty and perfection to the home color on your walls.
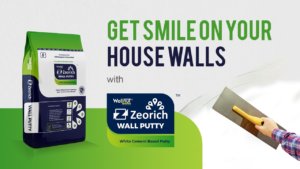
Correct application of wall putty has a very critical role when it comes to the painting process of your home or office, if you're seeking flawless walls at your dream home and office, it is important to know the correct wall putty for your painting job.
A white cement based wall putty is the best option considered in the industry which has achieved tremendous success over the years. White cement based putty is mostly used for the interior or exterior of residential or commercial spaces. It is made using white cement-based finer powder, special additives, and fillers which can act as putty, sealers on plaster or concrete walls and roofs.
Benefits of Wall Putty:
Smooth Painting experience - When applied correctly to the walls, wall putty fills the leaks, cracks, and faults on the surface. Wall Putty form an astounding bonding to the base concrete or plastered surfaces. Therefore, when applied over inside or outside walls of a home, application of wall putty can create a smooth undulation free surface for a beautiful paint finish.
Increases the Life of the Paint - Wall Putty has astounding adhesion and tensile strength, thus, when applied to walls before wall painting it adds to the life of the wall paint. Moreover, wall putty reduces deterioration of walls by making it water-resistant, flake resistant, and abrasion-resistant.
Smooth Surface for Painting - When applied perfectly to the walls, Wall Putty fills the blemishes, cracks, and fault on a surface level. Wall Putty forms an astounding bonding to the base concrete or plastered surfaces. In this manner, when applied over outside or inside walls of a home, application of wall putty can make a smooth undulation free surface for a wonderful paint finish.
Elongates the Life of the Paint - Wall Putty has superb attachment and rigidity, accordingly, when applied to walls before wall painting it adds to the life of the wall paint. Also, wall putty decreases the disintegration of walls by making them water-resistant, flake-resistant, and abrasion-resistant.
Surface preparation:
Before you begin, you must ensure that the surface on which you apply is made with cement material and plastered correctly.
To begin first you should clean the surface of the old wallpaper, paint, and other contaminants from the walls.
Ensure that the surface is sound, clean, and free from all foreign material such as oil, grease, dust, etc.
Give separate treatment or measure for dispensing with dampness, efflorescence, spillages, and so on in the event that they are as of now exist on your walls
Make sure the surface is completely neat and clean, there should not be dust, loose particle, oil, grease, or any other forms of contamination.
In case working on the external surface, avoid applying putty on a hot surface. First, let cool the surface with water spray or using a wet sponge. The hot surface may compromise the final performance of Zeorich wall putty
In case of high absorbent surfaces such as gypsum plaster or AAC block, before starting the application first, apply the suitable Primer to reduce the absorption of surfaces.
Important tools for application:
Electric low-speed mixing stirrer.
Vacuum cleaner/blower to remove surface dust.
Skim coat applicator/ putty blade
Cleaning sponge of good quality.
Other mixing & finishing tools such as mixing trowel, bucket, brush, broom, measuring tape, etc.
Mixing:
Mix wall putty with clean water as suggested by the manufacture and follow the mixing instruction set by the manufacture. Use slow speed electric stirrer for mixing to have desired results or by hand for 15 to 20 mins. Manual mixing if not done properly may compromise final results. Mix thoroughly to obtain smooth slurry paste for application.
Adjust the water quantity as per ambient temperature and dryness of the surface. The final mix must be workable slurry paste. Make sure there is no lump and you can use the paste for at least 2 to 3 hours.
Application of Wall Putty:
Before you start applying putty to the surface, it's recommended to use good quality primer then fill all the imperfections on walls with the putty.
To obtain the best result it is advised to have at least 2 coats of putty on your wall with a minimum of 1.5 mm thickness. There has to be a minimum 6 hours interval between both the coats then you leave the surface to dry for 12 hours to 24 hours until you see the surface completely dry.
Make sure you apply the putty from different directions during both the coat.
The Next Step is to sandpaper the surface of the wall after the putty is applied and dried properly. We often recommend using sandpaper of 150th or other papers as per the contractor's recommendation
Make sure you rub the walls gently with sandpaper after the putty is dried each layer must be processed with sandpaper. Now check the surface with your hand to see the smoothness of the surface.
Once the surface is grinded properly; the process of paint application can be followed as per guidelines available.


UpMarketResearch published an exclusive report on “Wall Putty market” delivering key insights and providing a competitive advantage to clients through a detailed report.
Further, key players, major collaborations, merger & acquisitions along with trending innovation and business policies are reviewed in the report.
The report contains basic, secondary and advanced information pertaining to the Wall Putty global status and trend, market size, share, growth, trends analysis, segment and forecasts from 2018 - 2025.
The numerical data is backed up by statistical tools such as SWOT analysis, BCG matrix, SCOT analysis, PESTLE analysis and so on.
The statistics are represented in graphical format for a clear understanding on facts and figures.
For more information on this report, please visit: https://www.upmarketresearch.com/home/enquiry_before_buying/24881 The following manufacturers are covered in this report:K. Cement LtdMeichaoBirla WhiteNippon PaintWalplastPlatinum Plaster LtdWeber-Saint GobainDuluxUSG BoralMYK LaticreteLIONSLangoodMapeiAsian PaintsSKShuBauhiniaDuobangMeihui Wall Putty Production by RegionUnited StatesEuropeChinaJapanOther Regions Get Best Discount On This Report @ https://www.upmarketresearch.com/home/request_for_discount/24881 Global Wall Putty Market: Product Segment AnalysisCement-based PuttyGypsum-based Putty Wall Putty Breakdown Data by ApplicationResidential BuildingCommercial Building Get Free Exclusive PDF Sample Copy of This Report @ https://www.upmarketresearch.com/home/requested_sample/24881 The report categorizes the market into segments by companies, end-use, type and potential regions.

Further, increasing demand for eco-friendly and cost-effective construction products and rising demand from the developing economies expected to drive the demand for wall putty over the forecasted period.
What's Trending in Market:Increasing Demand for Eco-Friendly Construction ProductsGrowing Popularity As It Is Water ResistantChallenges:Complicated Application Process of Wall PuttyRestraints:Issues Related With Maintenance of Wall PuttySmooth Surface Fir Large Area Is Difficult To MaintainedMarket Growth Drivers:Growth in Construction Industry WorldwideIt Provides Silky and Smooth Finish to WallsGlobal Wall Putty Market Development Scenario by Players Ø Financials Information, Business Overview and Product Specification Matrix Ø Patent Analysis Briefing* [if applicable] Ø No.
of Patents Issuance by Year / by Players / By Issuing Office Ø Key Development – Product/Service Launch, Mergers & Acquisition, Joint Ventures Wall Putty Market Competition Each company profiled in the research document is studied considering various factors such as product and its application portfolios, market share, growth potential, future plans, and development activity.
Yes, we can add or profile new company as per client need in the report, provided it is available in our coverage list as mentioned in answer to Question 1 and after feasibility run final confirmation will be provided by research team checking the constraints related to difficulty of survey.
2) Can we narrow the available business segments?
What all regional slits covered with covid impact analysis?


Ambhuti Wall Putty is Situated in Alwar City, Alwar,Rajasthan is a top most place for the wall putty , and ambhuti is known as great player in the name of wall putty manufacturers in Rajasthan.
We are known as one-stop destination servicing customers both in alwar and from other parts of Rajasthan as well as covering whole country India.Ambhuti’s belief that customer happiness and satisfaction is as important as their products and services have helped this establishment garner a vast base of customers, which continues to grow by the day.Our business employs individuals that are dedicated towards their respective roles and put in a lot of effort to achieve the common vision and larger goals of the company.
In the near future, this business aims to expand its line of products and services and cater to a larger client base.
In Rajasthan, this establishment occupies a prominent location in Alwar City.
It is an effortless task in commuting to this establishment as there are various modes of transport readily available.
It is at Martiabas, Alwar, which makes it easy for first-time visitors in locating this establishment.It is known to provide top service in the following categories: Hardware Shops, Sanitaryware Dealers, and Waterproofing Contractors, tile Adhesive Dealers, Bathroom Fitting Dealers, Hardware Fitting Dealers, Wall Putty Manufacturers, and Adhesive Dealers-Fevicol.We are also looking forward to offer an opportunity to make our business partner using our fantastic dealer ship of our products like wall putty, tile adhesive, POP (Plaster of Paris), waterproofing solutions and many more


