


In this article, we have discussed the ways using which you can modify the sign-in account name on your Windows 10 PC. So, are you willing to change your account name on your Windows 10 PC? Refer to the instructions listed to accomplish the task. You may have a vast number of reasons to change the user account name. For instance, after recently changing your user account name for a temporary basis, nowyou want to enter the correct details. Now you want your actual name to be displayed rather than your pet name, or you might want to change the name of the user account in order to make it look a bit more private. So, irrespective of what the reason is, Windows 10 offersvariousmethods to change the user account name that gets displayed on the Sign-in screen. We have listed out two steps using which you can change your user account name on a Windows 10 PC.

How to change account name with Settings on Windows 10
Windows 10 pulls the user account name from the cloud if the system is using aMicrosoft account. Therefore, if you want the system’s account name to be changed, you need to change itusing the online source. You may follow along the steps mentioned below to change the name of your Windows 10 account:
- Launch Settings.
- Head over to the “Accounts” section.
- Tap on “Your info.”
- Further, tap on “Manage my Microsoft account.”
- If applicable, then use your credentials and Sign in to your account.
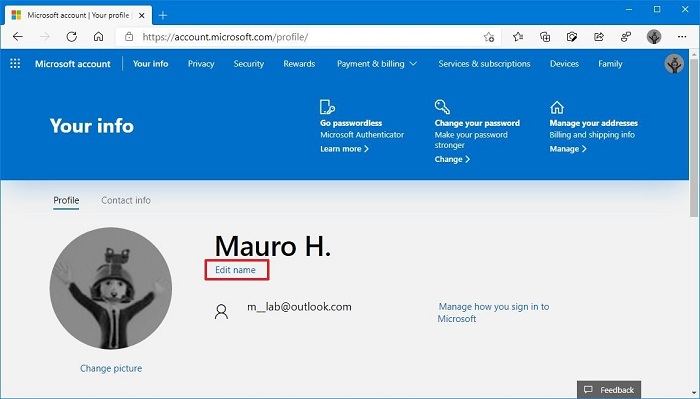
- Now tap on the “Your Info” tab.
- Click on “Edit name” appearing under your current name.
- Set the desired name for your account.
- Head over to complete the challenge so as to verify that you aren’t a robot.
- Finally, press the Save button and restart your system.
After completing the process, a new name will be reflected on theSign-in screen. You need to wait for a while and allow so as to let the changes sync and get applied to all your systems.
Change account name with Control Panel’s User Accounts
You need to follow the steps mentioned below if you want to change the user account name using Control Panel’s User Accounts settings:
- Launch Control Panel on your PC.
- Hit the “Change account type” option appearing under the “User Accounts” section.
- Now you need to change its name by selecting a local account.
- Tap on the option “Change the account name.”
- Now, you need to give a confirmation regarding the new account name on the Sign-in screen.
- Hit the icon for “Change Name.”
Once you have completed the steps listed above, you need to sign-out of youron-going session. You will now notice the Sign-in screen displaying the new name.
That’s all from us for now. These were the instructions using which you can change the user account name on your Windows 10 PC. Do let us know in the comment section in case you face any issues.


