


Introduction
It is essential to know how to trim the nails of your dog, if you want a happy, healthy dog. But it can best be intimidating to give your pet a pedicure. Fortunately, assistance is at hand. This guide for beginners to handle well trimmed pet nails covers all of the basics, including the preparation and working angle of Dremel's electrical pet nail sticker. You will learn how quickly you can go, giving you confidence while grinding, without hurting your pooch. Go on, go and find out that your animal's nails need not be stressful.
You May Also Like
Casfuy Dog Nail Grinder The Best Way of Grinding Dog Nail
Step 1. Buy A Electric Pet Nail Grinder
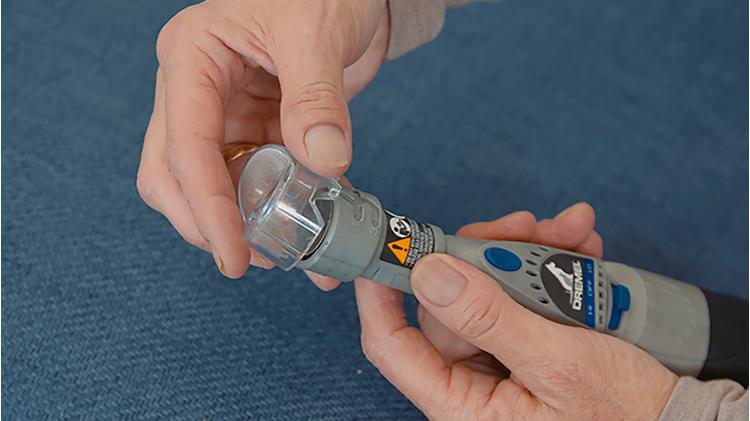
Do you use this Dremel Pet Nail Grooming Kit for the first time? Just pick it up, insert batteries and you're ready to go. You may want to clean it or replace the sanding disk if you've used it before. This is how the tool can be used:
- Remove the nail guard.
- Remove the old sanding
- Pull the mandrel down again while attaching the new sanding disc
- Open the grey section of the nail guard
- Slot the transparent
Step 2. Find a Comfortable Position
Find a comfortable location for both you and the dog before you start trimming your dog's nails. Place your dog so that you can easily reach all your paws without twisting your legs. For example, try the sofa. Put a towel on your robe, put your dog on the towel with your forepatches. You can hold the paw firmly and also have it in full view. Some owners find it easier not to sit opposite their animals, but instead to face them in the same way. Experimenting a little, you will soon find out which position works best for you and your bag.
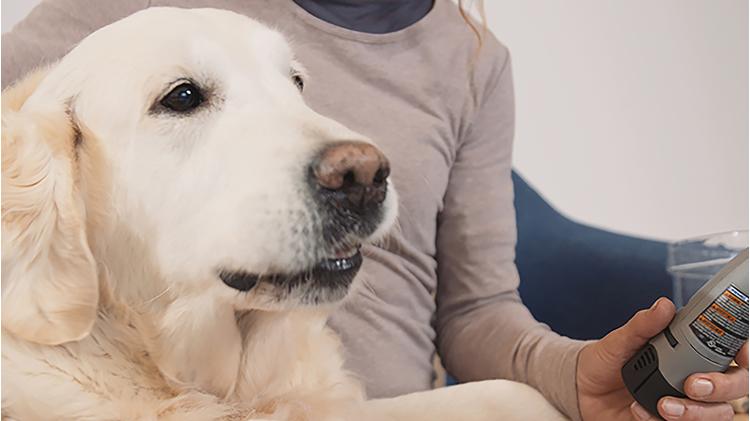
Step 3. Introduce Your Pet to the Electric Nail Grinder
Leave the dog to the electric pet nail grinder and the task at hand before you start your pet pedicure. Start by touching your paws carefully. If your animal is all right, follow up with a little rubbing on your paws. Just let the dog sniff, touch and reassure the instrument for a moment. Turn your dog's nails then on a couple of times without trimming them. This makes him or her familiar with the squeaky sounds and vibrations that the instruments produce. This is a brave dog, prepared for grooming.
Step 4. Determine How Short Nail to Be
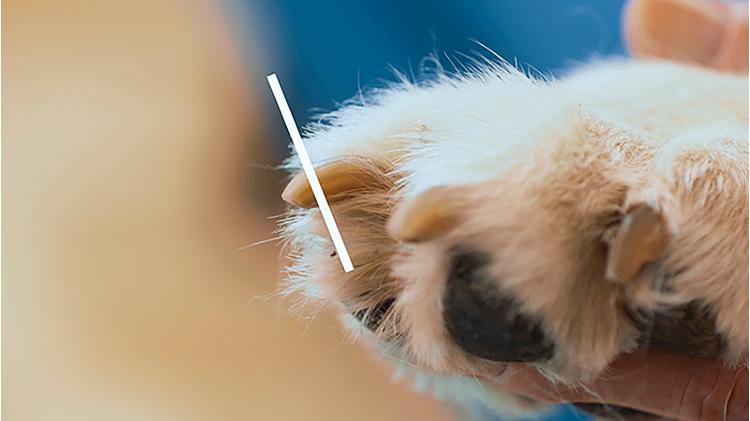
Take a closer look at the nails of your dog. Sit down the rose, living, fast part, where blood vessels and nerves flow. Cutting into that section causes your dog to yelp with pain and bleed with the nail, so you should be clear better. The fast can't be visible if your dog has black nails. Instead, find the spot in a triangle with two outer "walls" on the bottom of the nail. Cut the nail until you're sure you're safe. Aim for a rather straight result, remove a point tip so that when the dog stands the nails don't touch the floor.
Step 5. Start Trimming Your Dog’s Nails
Keep your non-dominant hand firmly on your paw. To separate and highlight the nail, press the toe gentlely. Turn it on; it is best to keep short nails in a low position, while the high position (if your dog allows it) works wonders on long nails. Hold the tool at an angle of 45 degrees, rest on the guard with the paw and touch the nail to the sanding disk. The angle means that you are going to follow the natural form of the nail, while keeping the guard off your dog's fur and protecting your pet if it doesn't remain silent. Don't press the nail too hard, let the instrument do your work.
Step 6. Have Little Breaks During Grooming
During your pet nail care session, dog want to keep it comfortable?? Have small intermediate breaks. When grinding creates friction and friction produces heat, a break prevents the sanding disk from heating and causes the nail to burn. A break from time to time gives you a moment of tranquilization and praise. Offer a well-deserved cuddle or a delicious treat to him or her. Use the pause to carefully study the nail. How much more needs to be broken off? Do you stay clear of the rose fast? When you have established how much more you have to trim, you go away again.
Step 7. File the Dewclaws’ Nails
On their forelegs, all dogs have thumbs or dewclaws. Sometimes they even have double dewclaws on their hind legs too. These additional toes are found on the leg a little higher and their nails must also be trimmed. In fact, the nails of the dwclaws can grow faster than other clots of your pet, so it is vital that you watch them closely every week. When cutting dewclaws' nails, it is best to remove the nail guard, as they can be harder to reach. Trimming the nails is easy: just file the tip away.
Step 8. Check of Your Pet’s Nails after Trimming
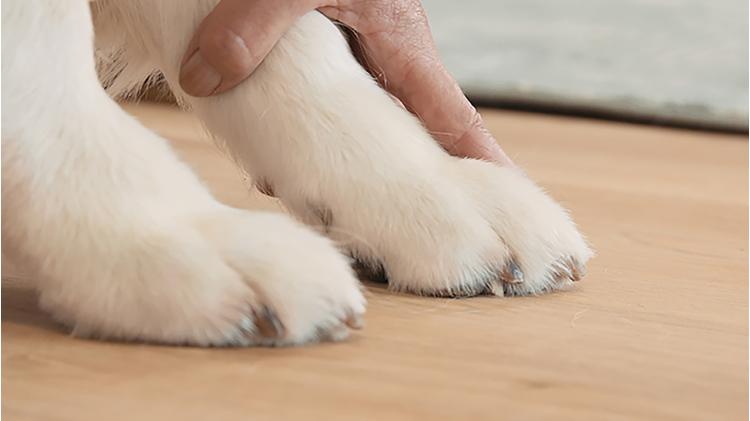
After all the nails have a good file on every paw, it is time to check your craftsmanship. Is it still too long your dog's nails, or is it time to finish your pet nail grooming? Hold your pooch in a flat, hard surface on all four legs and inspect each nail. When they no longer touch the ground, they were adequately trimmed.
Step 9. Praise Your Pet’s Good Behaviour
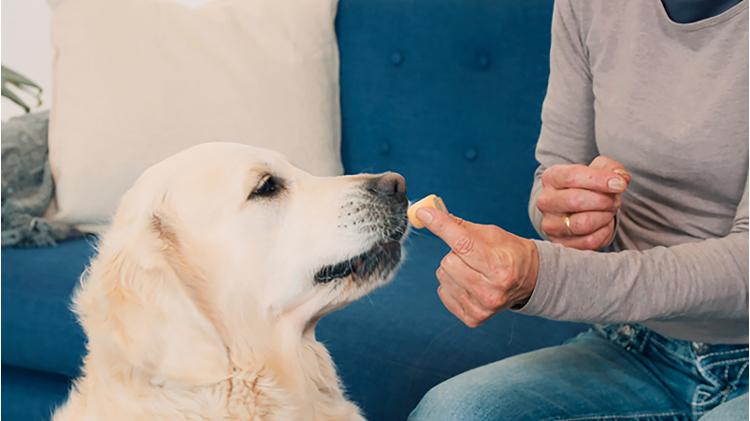
For most dogs, nail trimming is a stressful event, so it is a real achievement to achieve a successful pet pedicure. Good done! Good done! Share your dog with lots of praise and cuddles that you are proud of. This is also a great time to have a dog drink. By finishing the pet nail care with a high note, your dog may even begin the next one with a little less fear.
Where To Buy
Buing Darmel dog nail Grinder please go to any of the online marketplace
ExtendBuy for pet supplies and Amazon for Darmel Dog Nail Grinder


The 3D cart system, which comes with all of the essential features required to build, operate, and organize an online marketplace, allows you to manage your store over the Internet, set up real-time delivery options, and monitor both online and offline payment options, among other things.
We guarantee that whatever you get will be the best in the business.
Tech Prastish helps you to upgrade your web store with 3dcart design services in terms to enhance its appearance.


