


What you need to know
Your customer has chosen to use graphiteConnect for more efficient vendor master data management and streamlined Risk & Compliance reviews.
You get the benefit of self-managing your company information in one place, making it easy to notify your customers when you update your address and banking information.
First, create a user password
The Accept Invitation screen allows you to confirm your user name (as entered by your customer) and create a unique password.
Please note: The email you received from graphiteConnect includes a custom URL that is unique to your email address and cannot be shared. If needed, the "prefer a different email" link will generate a new invitation email and URL for this connection request.
Or, existing users simply log in
If you already have a username and password for graphiteConnect, you will still need to click on the button in the email you received, but your experience will be a little different. graphiteConnect will let you select one of your existing companies for this connection. This helps ensure that little things like typos don’t trigger a duplicate company in the system.If the customer invitation is really for a new company (like a sister company or subsidiary), then you must proceed with creating a new company profile as described in step 2.
Next, create your initial company profile
All new companies must provide a few pieces of basic information:
- Confirmation of company name and any DBA, business or trade names
- Country of registration
- Tax details, unique per country

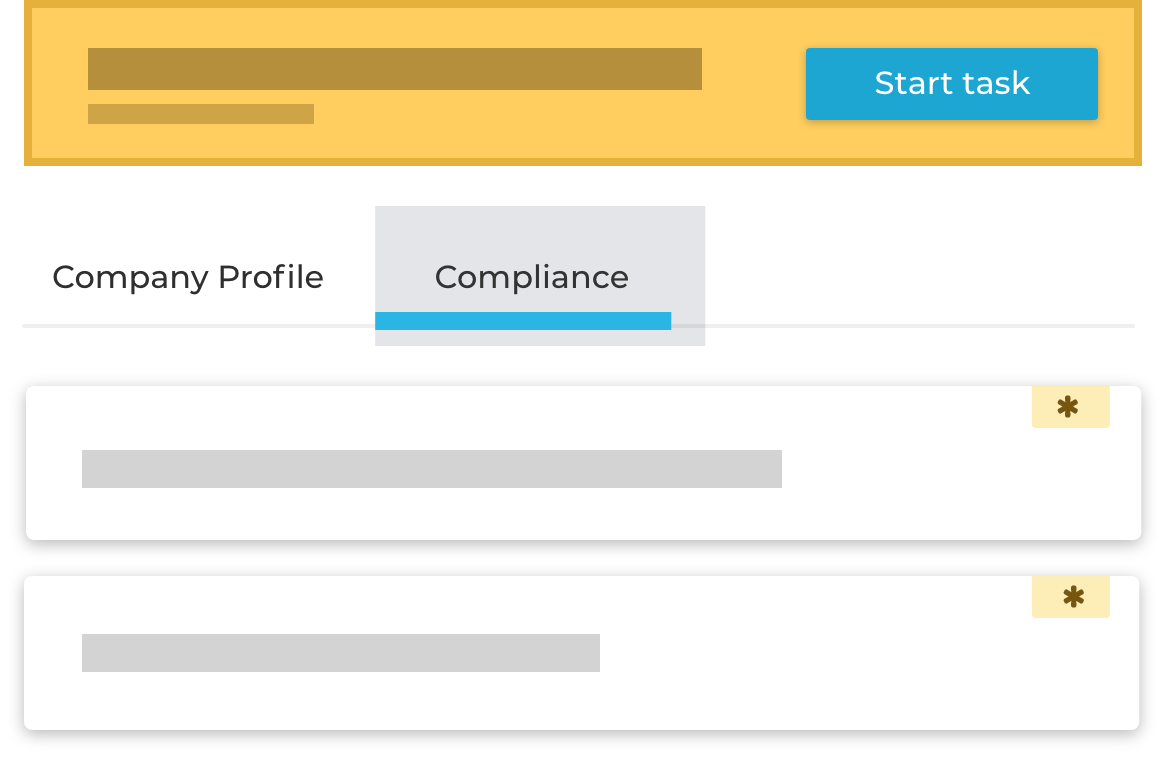
Then, complete the required questions
In addition to the basic company information, each customer may require more or less from its suppliers to accurately assess Risk & Compliance.
graphiteConnect makes it easy to track what information is required by highlighting missing fields. To make it even easier, just click on the "start task" link in the task tray and the system will take you exactly where you need to be.
Finally, accept the invitation
When all of the required tasks are completed, you will be asked to certify the information is correct and accept the invitation. When you click on the "Submit" button, the company that invited you will be notified and you move to the next step in the connection process.
For now, you are done!
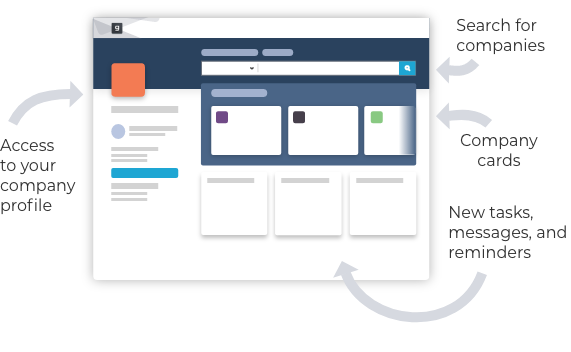
Track the connection process on your homepage. You will see it move from Review to Connect as your customer reviews your information. If any updates are necessary you will be contacted via in-app messaging. And remember, once you complete your company profile, the information is ready to go for the next customer connection, making the process faster each time you use graphiteConnect.
Was this article helpful?
1 out of 1 found this helpful


