


Are you a passionate gamer looking to share your gameplay with the world? Live streaming your gaming sessions on Facebook can be a great way to showcase your skills, connect with other gamers, and even build a following. However, if you've never done it before, the process can seem overwhelming. In this article, we'll provide a step-by-step guide on how to live stream games on Facebook and maximize your gaming reach.
Step 1: Set Up Your Equipment
Before you start live streaming, you'll need the right equipment. First and foremost, you'll need a gaming PC or console and a reliable internet connection. You'll also need a webcam if you plan on including a video feed of yourself during the stream. A microphone is also important for providing commentary and interacting with viewers.
Once you have your equipment, you'll need to download a streaming software such as OBS or Streamlabs OBS. These programs will allow you to capture your gameplay footage and stream it live on Facebook.
Step 2: Create a Facebook Page
To live stream games on Facebook, you'll need to have a Facebook page. If you don't already have one, you can create one for free. Make sure to choose a name and profile picture that reflect your gaming identity.
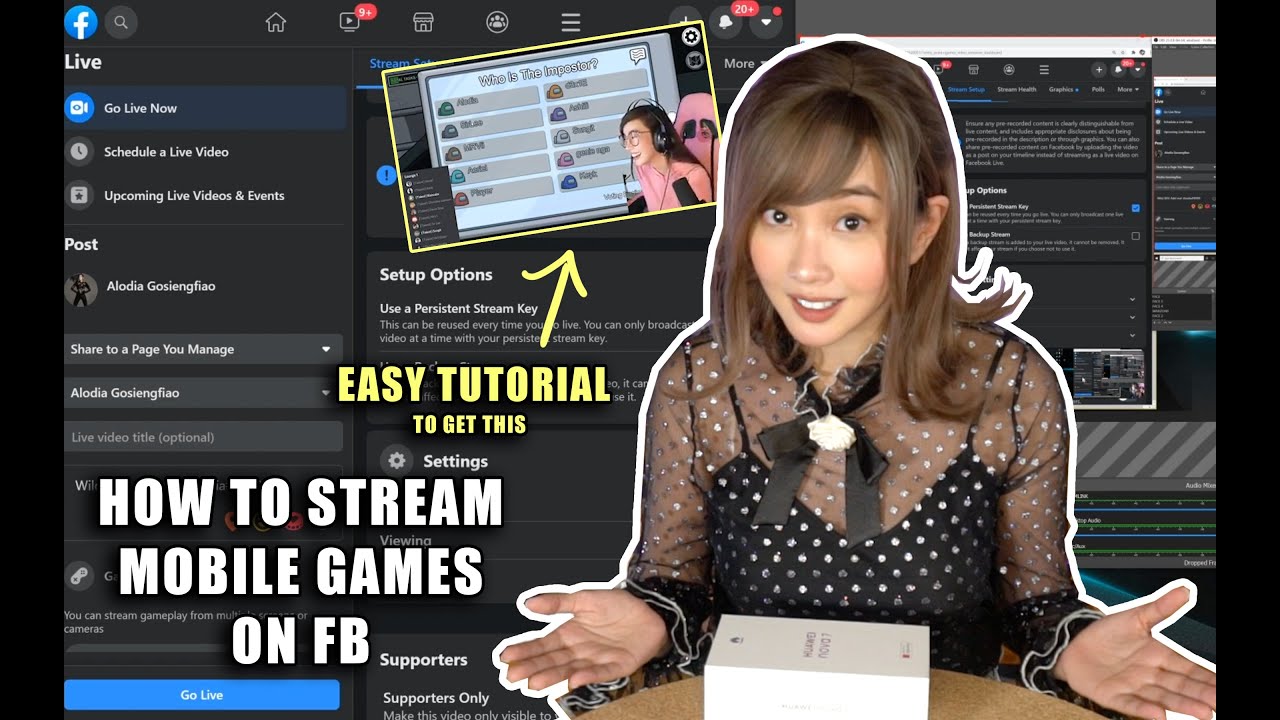
Step 3: Set Up Your Stream
Once you have your equipment and Facebook page set up, it's time to set up your stream. Open your streaming software and connect it to your Facebook account. Select "Facebook Live" as your streaming service and choose the Facebook page you want to stream on.
Next, configure your stream settings. Set your stream title, description, and choose the category that best fits your game. You can also choose whether to include a video feed of yourself, the game, or both.
Step 4: Test Your Stream
Before going live, it's important to test your stream to make sure everything is working properly. Start your stream in preview mode and make sure your game, video feed, and audio are all working correctly. If there are any issues, take the time to troubleshoot and fix them before going live.
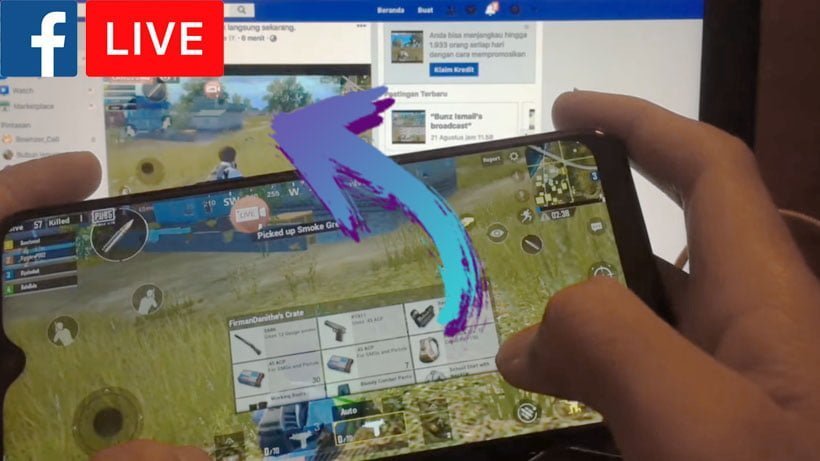
Step 5: Go Live!
Once you've tested your stream and everything is working correctly, it's time to go live! Click the "Go Live" button in your streaming software and start playing your game. Make sure to interact with your viewers by responding to comments and answering questions.
Step 6: Promote Your Stream
To maximize your reach, it's important to promote your stream before and during the broadcast. Share your stream on your Facebook page, gaming groups, and other social media platforms. Encourage your viewers to share the stream with their friends and followers as well.
Step 7: Engage with Your Viewers
During the stream, engage with your viewers by answering their questions, responding to comments, and thanking them for their support. Encourage them to follow your page and tune in to your future streams.
Step 8: Analyze Your Performance
After your stream is over, take the time to analyze your performance. Look at how many viewers you had, how long they watched, and what parts of the stream were most engaging. Use this information to improve your future streams and grow your audience.
In conclusion, live streaming games on Facebook can be a fun and rewarding way to connect with other gamers and build a following. By following these steps, you can set up your stream, engage with your viewers, and maximize your gaming reach. So, what are you waiting for? Get out there and start streaming!
References:
https://wigatos.com/21813-cara-siaran-langsung-game-di-fb/
https://pindahlubang.com/26733-cara-mengunci-akun-instagram/


Tribez Game For PC is a very interesting game where you can easily explore an islands.
There are a lot of characters in this game.
You can also play this game on various operating system platforms such as Android, Windows 7 / 8 / 8.1 / 10 / XP / Vista, Mac and iOS.
This app is also compatible with various OS.


Kerry wood struck out 20 batters in one game shirthttps://moteefe.com/store/kerry-wood-struck-out-20-batters-in-one-game-shirtShop Kerry wood struck out 20 batters in one game shirt.
You'd like to this Kerry wood struck out 20 batters in one game t shirt.

Are you looking for 100% Free Desktop Games.
Free computer games you can play, including a Strategy Game, Action Game, Shooter Game and many more.
Visit now fronga.com to play free games .Best Free Online Games for DesktopPlay Free Online Sports HTML GamesBest Action laptop Games At FrOnGa

A college basketball commentator, a health care entrepreneur, and a podcast producer are officially the men’s 3×3 basketball champions of the world.
Olympic 3×3 Basketball Fans from all over the world can book summer Olympic 3×3 Basketball Tickets online from our most trusted online ticket marketing platform.
Surely, there were two people named Kareem Maddox—one the former Princeton player who helped nearly upset Kentucky in the 2011 NCAA tournament and was now playing in the 3×3 world championships and another who produced a podcast.
The Ringer employs several podcast producers, and I used to be proud to call all of them my colleagues.
Team USA was the only undefeated team in the whole World Cup, outscoring their opponents by an average of 9.1 points per game—pretty impressive in games that end as soon as a team scores 21 or more points.
Perhaps the part-time nature of the champions seems fitting for 3×3 Basketball, a game primarily played when you don’t have enough people for a full game, and there’s a guy shouting on the other end of the court and you don’t want to ask him to move.
Get your Olympic 3x3 Basketball Tickets online
visit: https://www.olympictickets2020.com/olympic-games-tickets/olympic-3x3-basketball-tickets/


